Best Ways to Access Mac Remotely: Built-in & Software-based
Remote desktop control for Mac computers from a Windows workstations and iOS devices, like an iPhone or iPad, allows you to access and control your Mac workstation from anywhere. From this article, you will learn all the different ways to safely access your Mac over a distance and choose one that suits your needs the most.
Not into text articles? We’ve got a brief video covering the main points of accessing and controlling your Mac device remotely.
Controlling a Mac via Apple Remote Desktop
Apple Remote Desktop is a paid add-on app that allows you to control multiple computers remotely over a network to exchange files, install updates, run apps, schedule automated tasks, etc.
It can be a nice option for those looking for a way to operate an office macOS workstation from home or get emergency assistance from your company’s tech team.
In essence, Apple Remote Desktop is a Mac alternative to Microsoft’s counterpart Remote Desktop Connection client.
Enabling Remote Management
But to control and manage a remote computer, you must enable Remote Management for it first, which is a macOS feature you can use to allow remote access to your device via Apple Remote Desktop, Microsoft Remote Desktop client for Mac, or any other third-party RDP client app.
How to enable Remote Management on your macOS device
- Go to Apple Menu > System Settings.
- In the sidebar, click General, then scroll down to find Sharing.
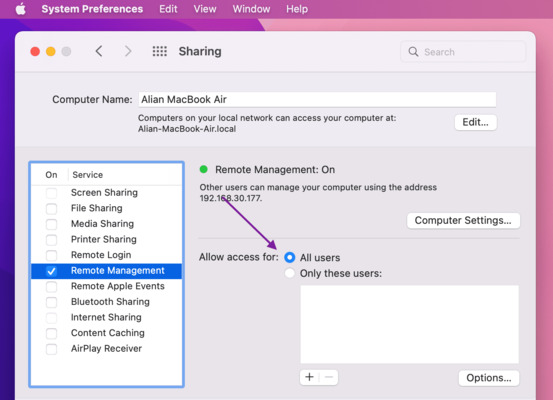
- Tick the box next to the Remote Management service to turn it on and specify the level of access allowed in the authorized remote access section:

- Choose who you want to allow access from the menu:
The basics of using Apple Remote Desktop
- Download Remote Desktop from the App Store and follow the setup assistant to install it on your device:

- If you have a Task Server, enter its address and click Continue.
- Install the Remote Desktop client app on all your computers (it’s already pre-installed on macOS ones).
- Use Scanner to find and add all the client machines from your Bonjour domain that need Apple remote access.
Note: You can’t use the Apple Remote Desktop app on your iPad or iPhone as there is no mobile version at the moment/ Install the Microsoft Remote Desktop client for iOS instead.
Connect to a remote Mac with Screen Sharing
Mac’s built-in Screen Sharing feature allows you to access a Mac from another device on the same network. It will be especially useful to those looking for an easy way to connect two computers that use the same iCloud account.
Note: You can also remotely access your Mac from iPads, iPhones, Windows, or Linux computers via Screen Sharing.
How to access Mac via screen sharing
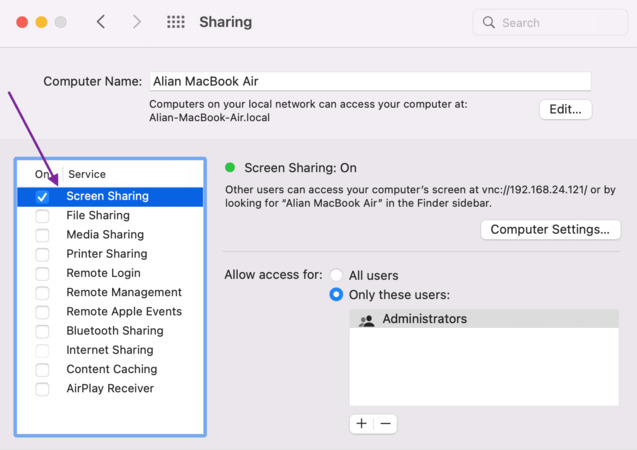
- Go to Apple Menu > System Settings > Sharing and tick the checkbox (shown below) to enable Screen Sharing:
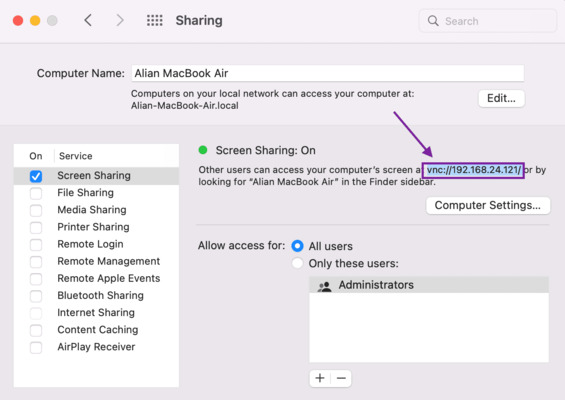
- Specify who can and cannot access your Mac under the “Allow access for” section and write down your Mac’s IP address:
- For additional safety, you can set up a password to prompt when connecting to your Mac remotely. Click Computer Settings.
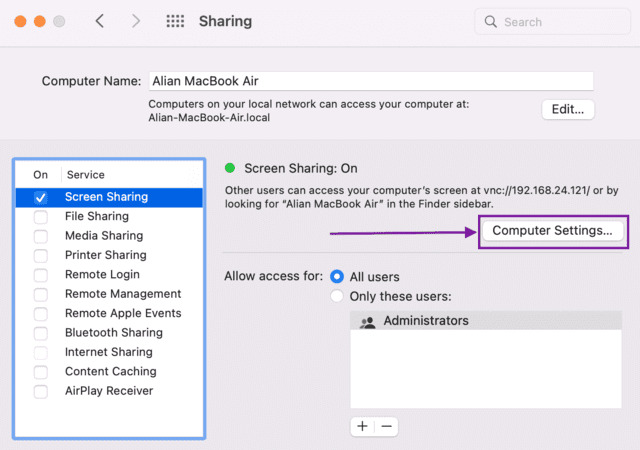
- Enter a password to allow VNC viewers to control the screen and click “OK”:

- Now, on the other Mac, go to Finder > Go > Connect to Server and type the IP address into the respective text box.
- Request the connection via Permissions.
- For other devices connecting to a remote Mac, type the IP address of your Mac into the VNC app:

- On the Authentification tab, log in using the password you’ve already created.
- Hit Connect (as shown below):

Accessing Mac remotely with Remote Login
Remote Login is a built-in macOS service that enables remote connectivity to Mac from other Mac devices using SSH (Secure Shell Protocol) or SFTP (SSH File Transfer Protocol). Keep reading to find out what you need to do to enable this feature on your device.
Setting up Remote Login
- Go to Apple Menu > System Settings.
- In the sidebar, click General, then scroll down to find Sharing.
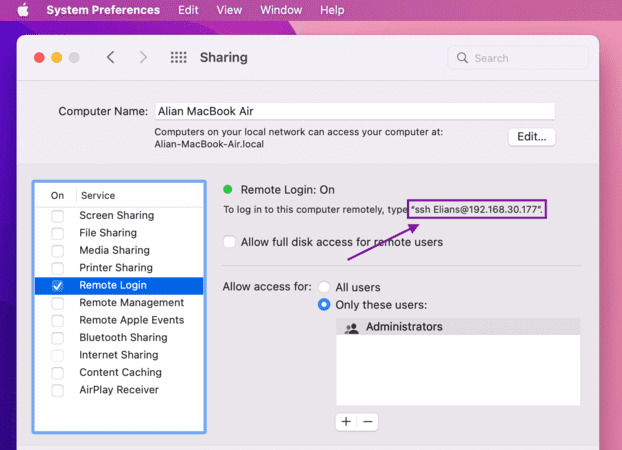
- Tick the box next to the Remote Login service to turn it on, then tick the “Allow full disk access for remote users” checkbox, if needed.
- Use the bullet list to specify if you want to allow remote access for all users in your local network or only the specific ones.
- Copy the ssh username@hostname command and pass it to the other devices that will access your Mac remotely:
Safety precautions
By allowing remote access to Mac via Remote Login, you are making your device less secure. Here are some of the measures you may take to control your Mac remotely without compromising your system and data safety:
- ➤ “Strong” passwords: it’s strongly recommended never to use any easy-to-guess passwords like your date of birth, kid’s name, etc. Use an automatically generated password instead and only store them in secure locations like Keychain Access or iCloud Keychain.
- ➤ Passkeys: use Touch ID and Face ID to log into your Mac account on mobile devices.
- ➤ Guest accounts: whenever you are letting someone else use your device, set up a separate user account or a guest account to prevent them from accessing personal data.
- ➤ Hot corners: set up one of four hot corners to lock the screen and use it every time you leave your device unattended.
- ➤ Admin privileges: set up your account as the only administrator for your device and limit all the other accounts’ ability to install and remove software and change settings.
- ➤ FileVault: for any sensitive data, use FileVault encryption so no one else can read or copy your data without your permission.
One-link remote access with HelpWire
In exploring various methods to access Mac remotely, this remote support software emerges as a notable option. HelpWire simplifies the remote connection process, making it a practical choice for those needing to remotely connect and control Mac systems. Its straightforward approach reduces the technical complexity often associated with remote desktop access, aligning well with the needs of users seeking an efficient and hassle-free solution.
How to access remote Mac with HelpWire
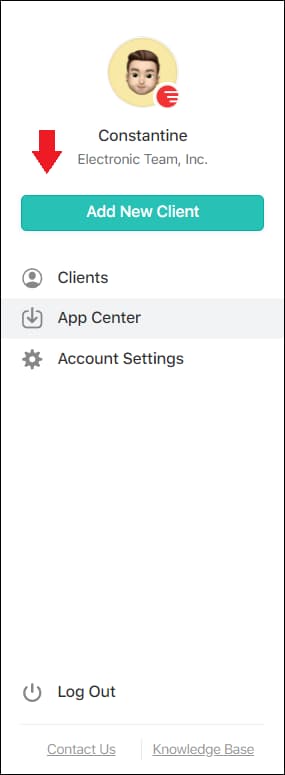
- Select the ‘Add New Client’ option.
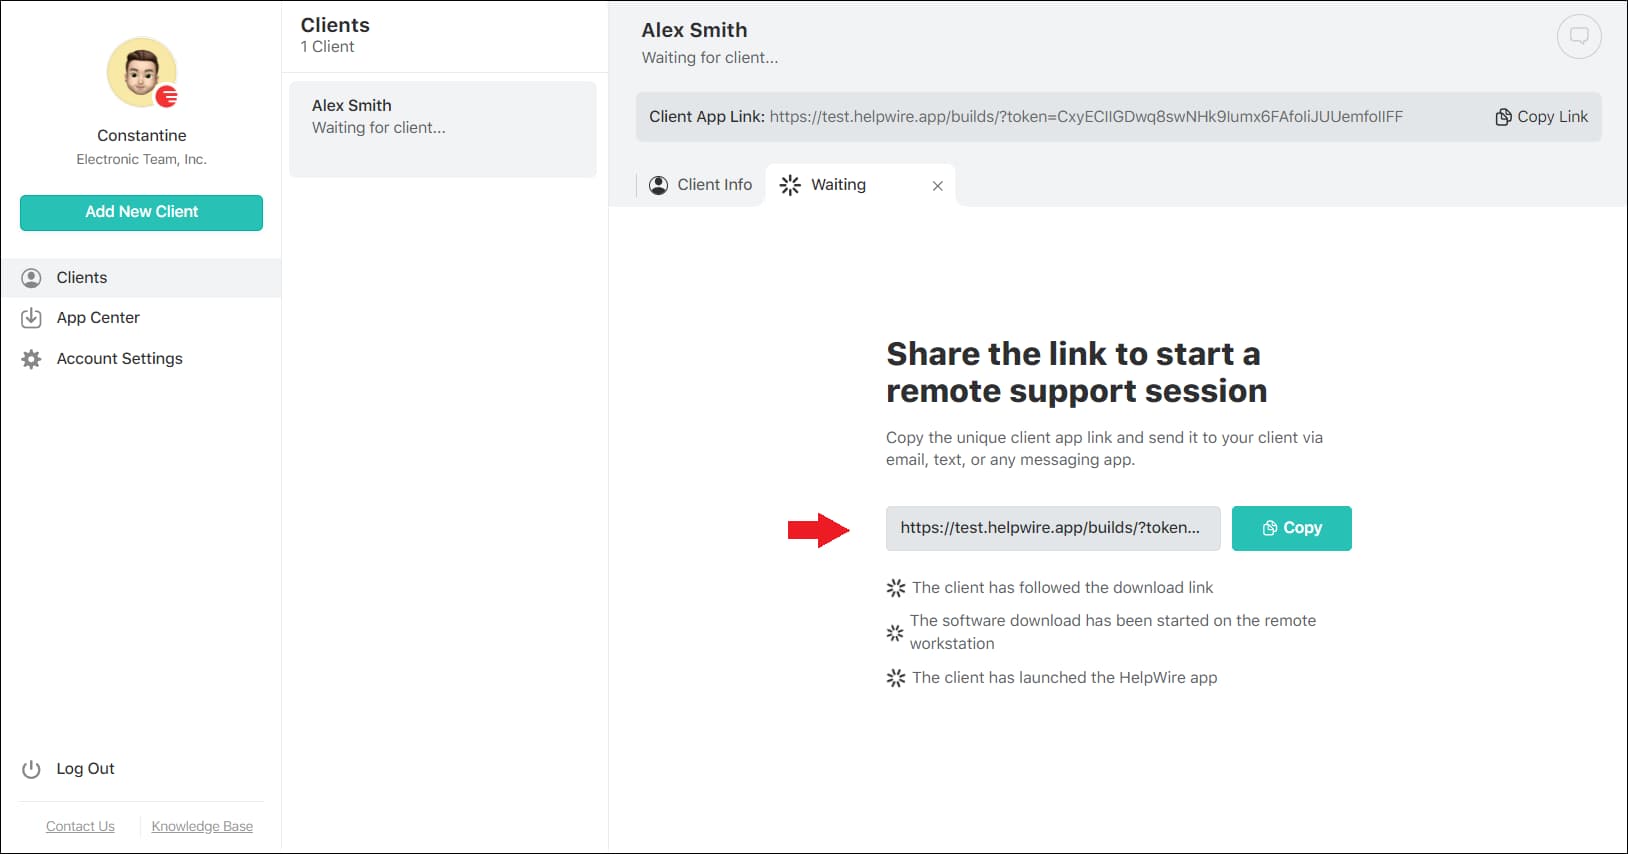
- Share the auto-generated remote connection link with your client. This link will prompt the download of the HelpWire Client application on the client’s computer.
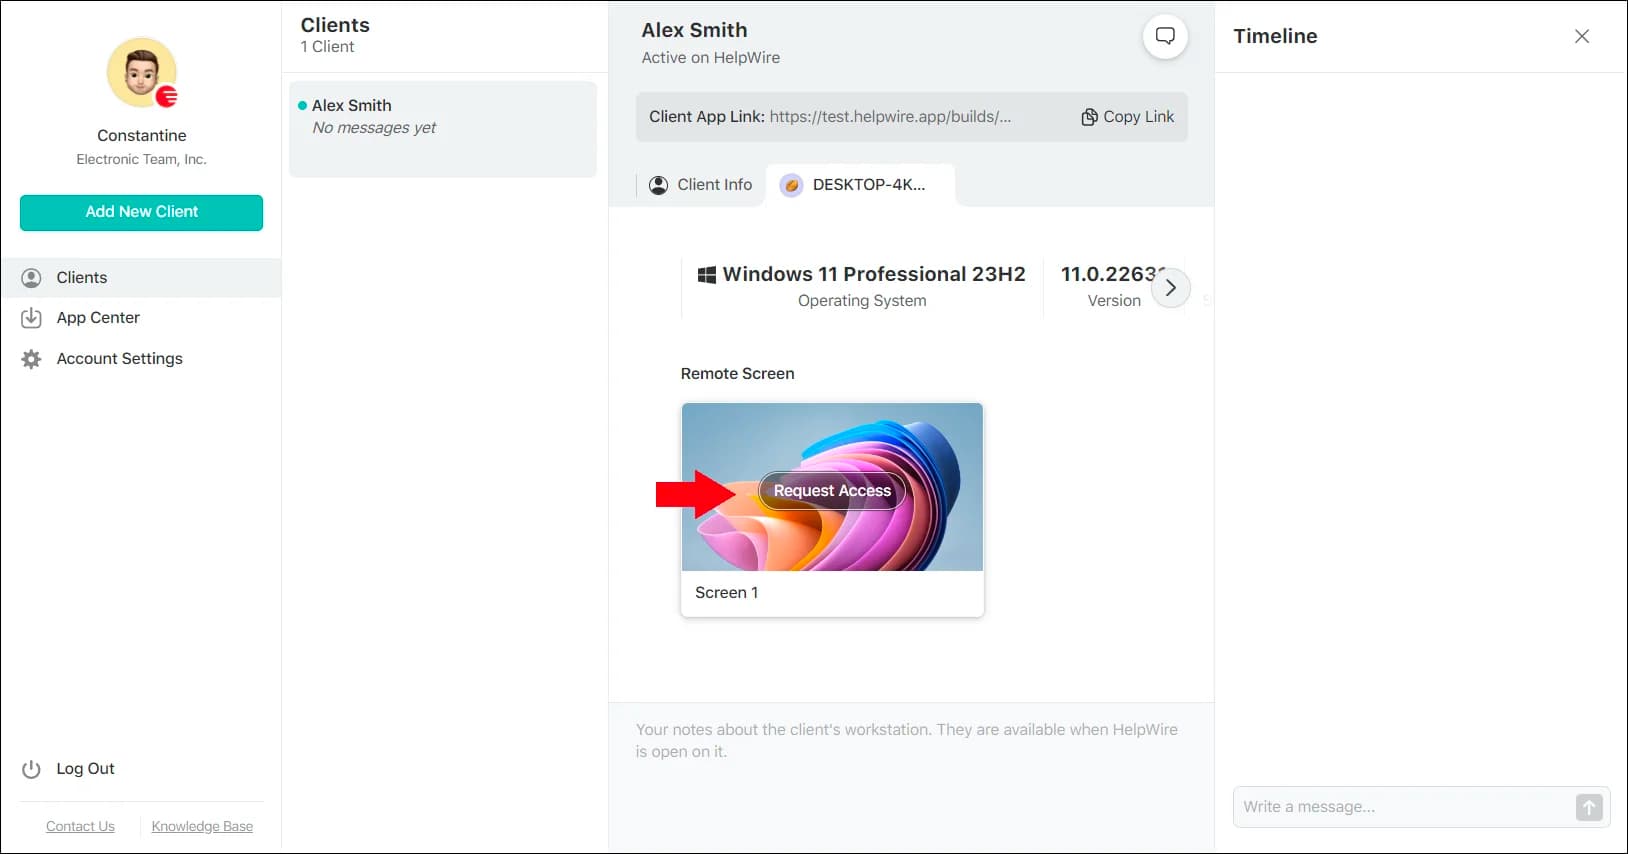
- Once the client has launched the application on their system, you can initiate a Request Access.
- After the client grants permission, select ‘Connect’ to form a connection with the client’s Mac, enabling you to remotely control it.

While HelpWire might not offer the deep customization of some other methods, its simplicity and effectiveness make it a worthwhile consideration for users prioritizing ease and efficiency in remote access solutions.
Final words
In this article, we’ve explored a variety of methods for remotely accessing Mac computers, each offering unique advantages tailored to different needs.
From the robust capabilities of Apple Remote Desktop and the inherent simplicity of Screen Sharing to the streamlined connectivity of HelpWire and the technical prowess of Remote Login, users have a range of options at their disposal. Whether for professional IT support, personal convenience, or secure file access, these tools ensure that users can maintain productivity and connectivity with their Mac from anywhere.
As technology continues to evolve, these methods stand as testaments to the flexibility and adaptability of remote access solutions in our increasingly digital world.
FAQ
What’s the difference between Screen Sharing, Remote Management, and Remote Login?
Remote Management gives other users full access to the computer using Apple Remote Desktop.
Remote Login lets users of other computers access this computer using SSH and SFTP.
How do I establish remote access to Mac not on the same network?
How can I remote control my Mac if it’s not turned on?
Those without a configured WOL can’t remotely access a Mac unless it’s already on/awake.