How to Use Microsoft Remote Desktop Mac
- HelpWire
- →
- Blog
- →
- Mac Remote Access
- →
- How to set up Microsoft Remote Desktop
If you’re wondering how to access Microsoft Remote Desktop on your Mac, the good news is that it’s possible. Microsoft offers an official tool that lets you seamlessly connect to Windows applications or PCs from your Mac. However, it’s important to note that the Windows app has replaced Microsoft Remote Desktop. This new version retains the same remote access functionality while providing better integration with modern Windows features.
This guide will walk you through the steps to set up your Microsoft Remote Desktop (or the Windows app) on your Mac, ensuring you experience a seamless and secure connection to your Windows PC.
How to Set Up a Remote Desktop Connection for Mac
Step 1: Download the Windows App
Download the Windows App from the Mac App Store to begin using remote desktop access on your Mac.
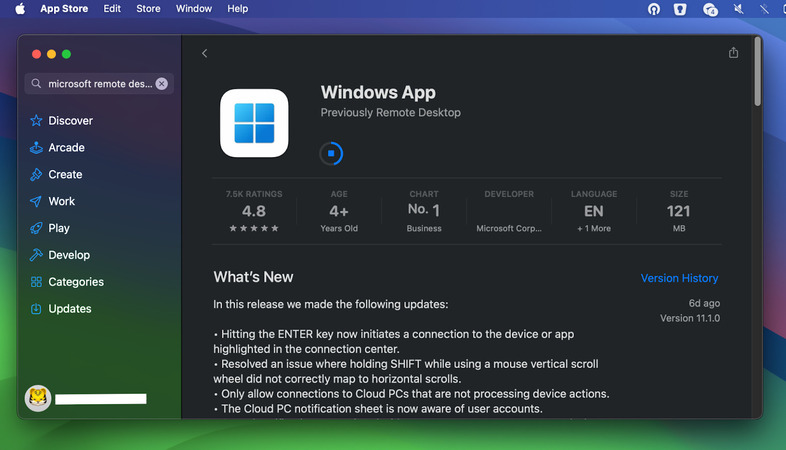
Step 2: Open the Windows App
Open the Windows App from the Applications folder, Spotlight Search (Command + Space, then type “Windows App”), or Launchpad. For quick access, drag the icon to your Dock.
Step 3: Enable Remote Access on the Target PC
Before connecting to a Windows computer, you must enable Remote Desktop on that system. If you’re using Windows 10 or 11 Professional editions, follow these steps:
- Go to Start→ Settings → System → Remote Desktop.
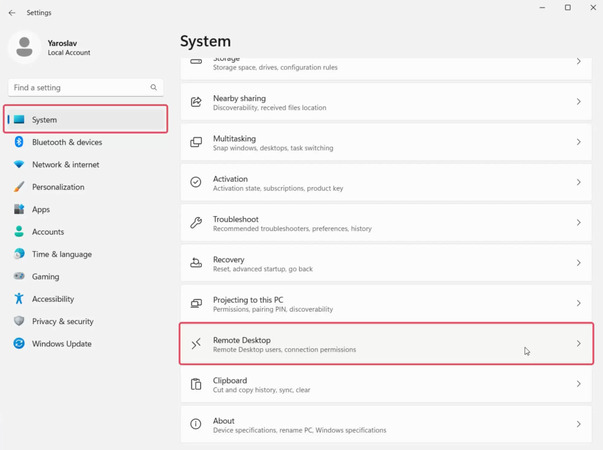
2. Make sure the Enable Remote Desktop option is turned on. You may be prompted to enter administrator credentials to complete this step.
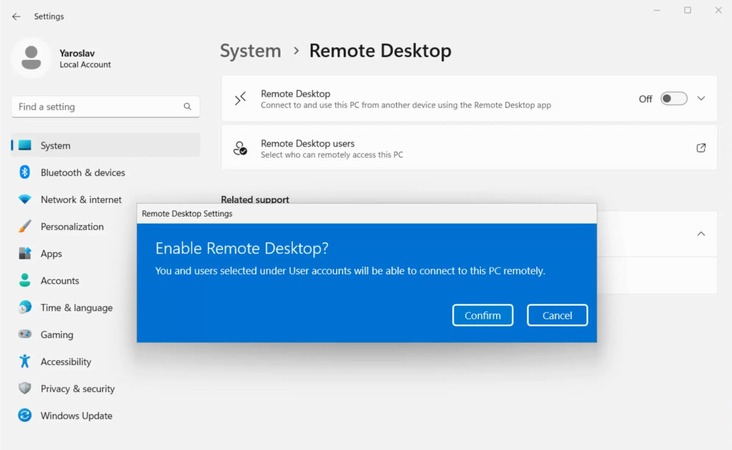
- To get a successful connection, disable Sleep Mode on the target PC:
Go to Start → Settings → Power & Sleep, then use the drop-down menus to turn off sleep mode.
- Next, verify the PC name by heading to Control Panel → System and Security → System. You’ll need this name to set up a remote connection.
As a replacement, you can find the IP address by opening Command Prompt, typing ipconfig, and pressing Enter. Remember that if your PC’s IP address is assigned dynamically, it may change over time, making this method less reliable.
Step 4: Add a Remote PC in the Windows App
On your Mac, open the Windows App and click Add PC or the + icon. A configuration window will appear, where you’ll need to enter the following details:
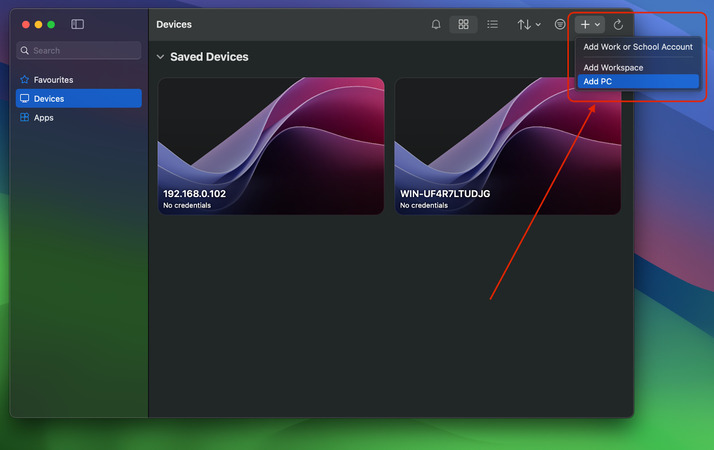
- PC Name or IP Address – Input the name or IP address of the Windows PC you want to connect to.
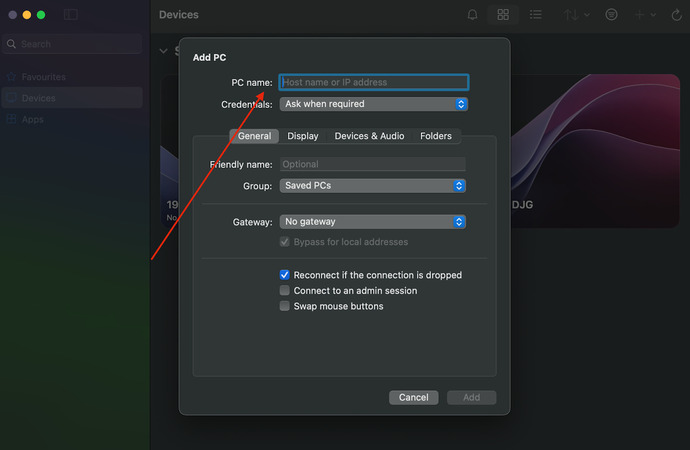
2. User Account – Enter the username and password of the remote Windows PC. From the credentials drop-down menu, you can choose to Ask When Required or save the login credentials for future sessions.
3. Friendly Name – Assign a recognizable name (e.g., Greg’s Work Computer).
4. You can also configure optional settings such as Gateway, Reconnect if dropped, and Swap mouse buttons as needed.
5. Modify the Display, Devices & Audio, and Folder Redirection settings according to your preferences.
6. Click Add to save the remote connection once all settings are configured.
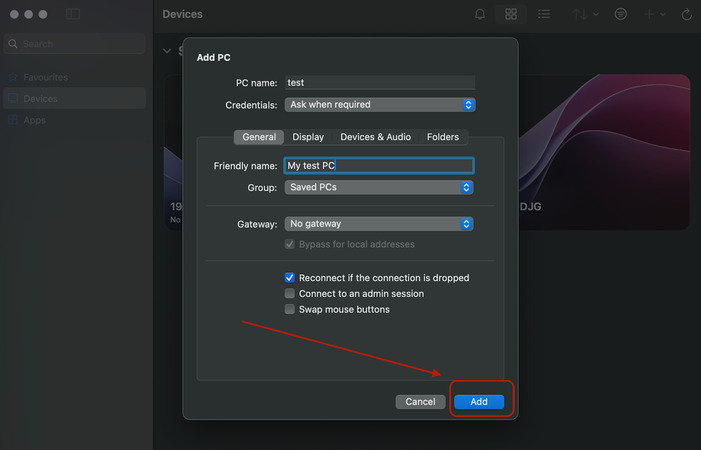
Step 5: Connect to the Remote PC
Now, you know how to set up Microsoft Remote Desktop on Mac. To start a remote session, simply double-click the connection you just created. If you’ve followed the steps correctly and entered the right login credentials, your Windows desktop will appear on your Mac, allowing you to work remotely.
To manage your connections, right-click (Control + Click) on a saved PC in the Windows App to edit, duplicate, export, or even delete the connection. As you will notice, the Windows App lets Mac users connect to and manage remote Windows PCs effortlessly, streamlining remote work and IT administration.
Remote Desktop App for Mac for Cross-Platform Connections
If you’re searching for a solid alternative to the Windows App for troubleshooting and remote access, HelpWire is a great remote desktop app for Mac providing a seamless solution—especially since the Windows App doesn’t support Windows Home users.
HelpWire is free and offers secure remote access, multi-device support, file transfers, real-time chat, and hassle-free connectivity. This user-friendly remote desktop software eases the complexities of traditional remote connections, making it accessible for users of all skill levels.
Accessing a Remote PC from Mac Using HelpWire
-
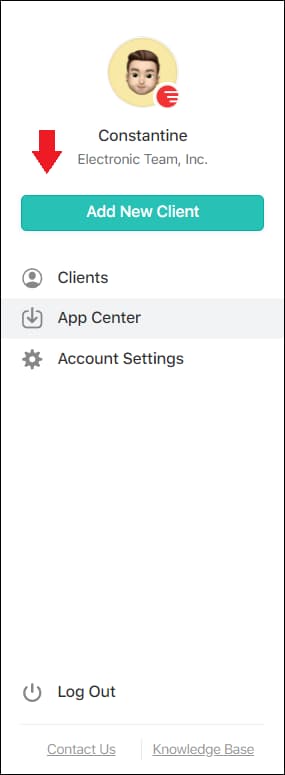
Begin by selecting the ‘Add New Client’ option within the HelpWire account.
-
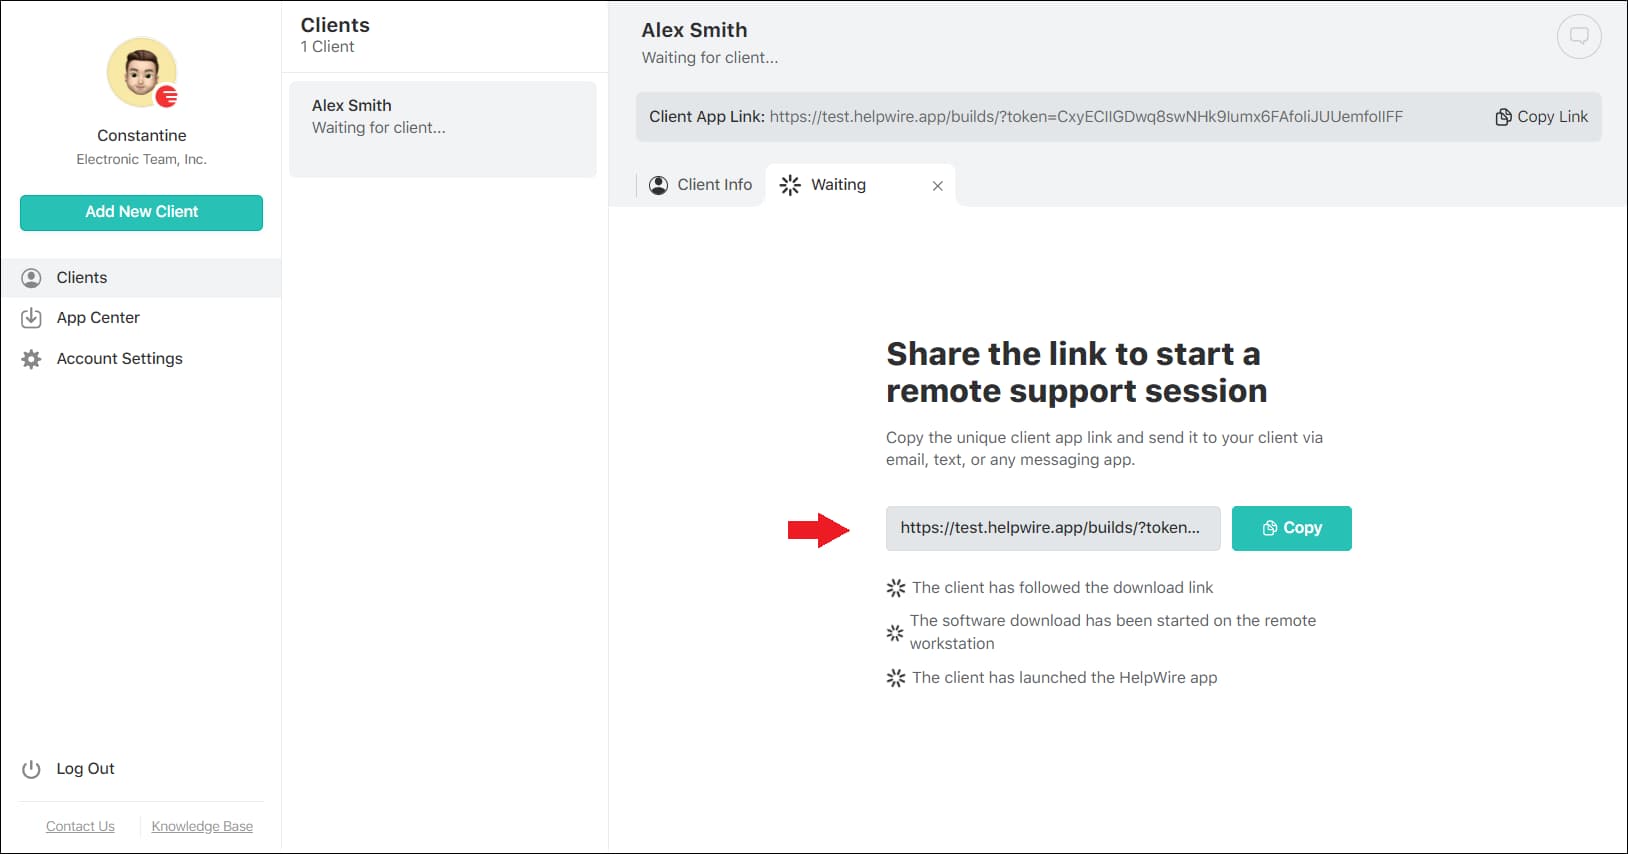
You’ll then share an auto-generated link for remote connection with your client. This unique link directs your client to download the HelpWire Client application on their computer.
-
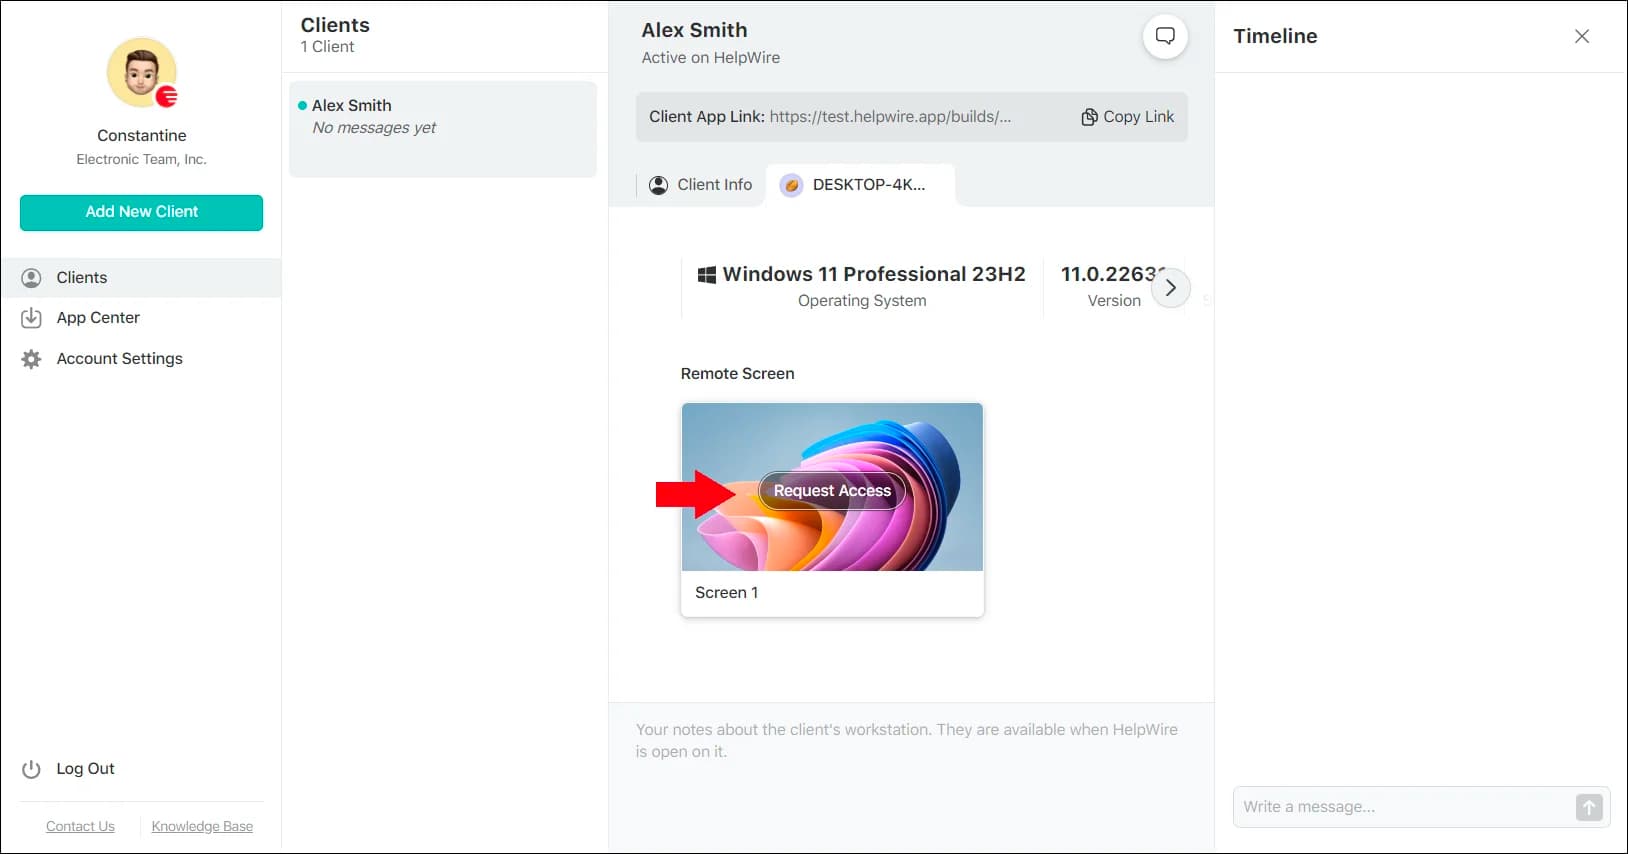
Once your client opens the application on their end, you can proceed by requesting access to their system.
-
Upon receiving permission from the client, click ‘Connect’ to establish a direct connection to the client’s device.

HelpWire emphasis on simplicity and operational efficiency positions it as a strong choice for individuals who value ease and effectiveness in their remote access tools.
Frequently Asked Questions
This error indicates that you are attempting to access a session for which you do not have the proper privileges. This happens if you try to connect to the console or another admin session. Turn off the console switch in the remote desktop’s advanced settings to resolve this issue. If that doesn’t work, you will need to engage a system administrator to solve the problem. Also sometimes the 0x204 error could appear when macOS users attempt to establish a Remote Desktop Mac connection with a Windows PC.
Mac and Windows keyboards offer the same functionality using different key combinations and keyboard layouts. Examples include:
- The Mac’s Command key is equivalent to the Windows key.
- Ctrl+keystroke combinations on Windows equals Command+keystroke on a Mac.
- Function keys on a Mac are accessible by pressing and holding the FN key.
The default is for the remote session to use the same keyboard locale as the operating system running the client. If this is not the case in your remote session, you may need to manually change the keyboard setting on the remote computer. You can obtain more information about keyboards and locales on this support page.