How to Change Remote Desktop Port – Windows 11 Guide
- HelpWire
- →
- Blog
- →
- Remote Desktop Protocol
- →
- How To Change Remote Desktop Port
By default, Windows uses the TCP port 3389 to listen for RDP session requests. It may be necessary to change port number to something else for various reasons. You may want to avoid unwanted attempts to connect to your PC over Remote Desktop Protocol, or use this port for a different application or service. There are several ways to change your RDP protocol port, as long as you have administrator rights.
How to Change RDP Port in Regedit
-
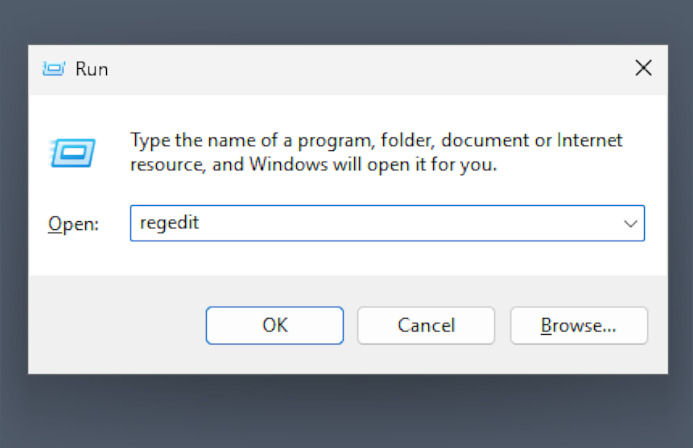
Press Win+R to open the Run prompt. Type “regedit” and press Enter. When asked if you want to allow the app to make changes to your device, agree.
-
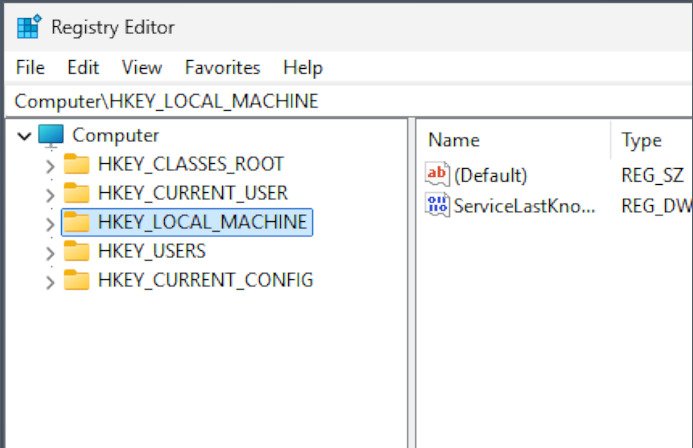
Click the “HKEY_LOCAL_MACHINE” folder (also called “key”) to highlight it.
-
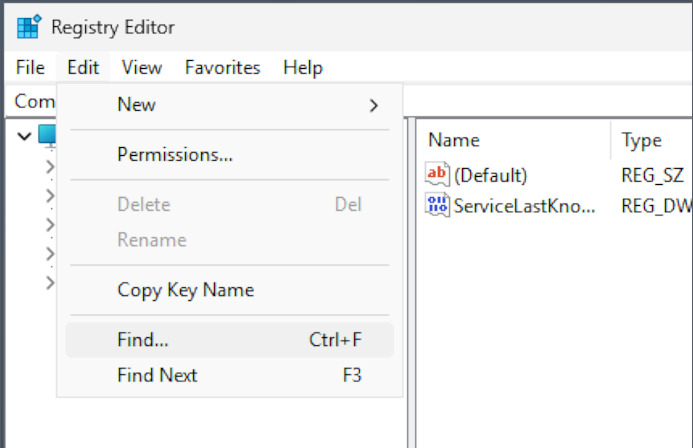
Click “Edit” > “Find” on the menu bar, or press Ctrl+F.
-
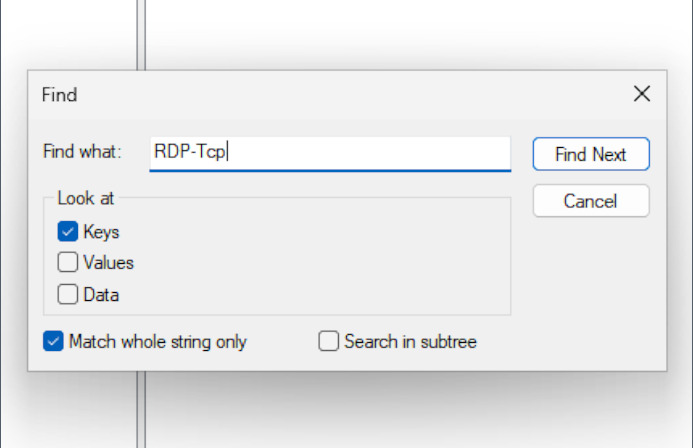
Look for keys called “RDP-Tcp”, and enable “Match whole string only”. This may take about 10 seconds.
-
You should now have the RDP-Tcp key open. Find the PortNumber value and double-click it.
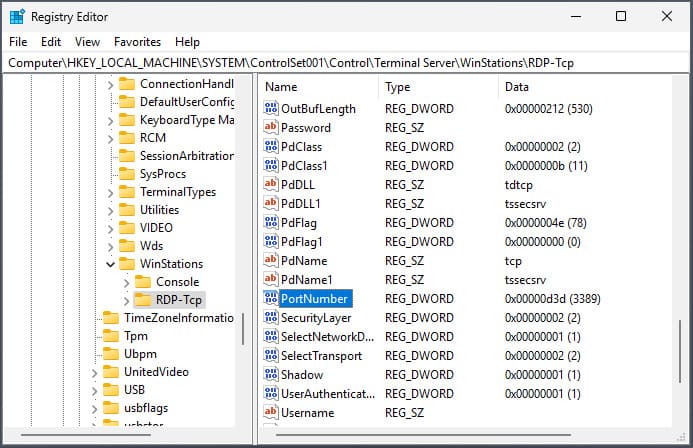
-
Select “Decimal” and enter the new port number. Confirm the change.
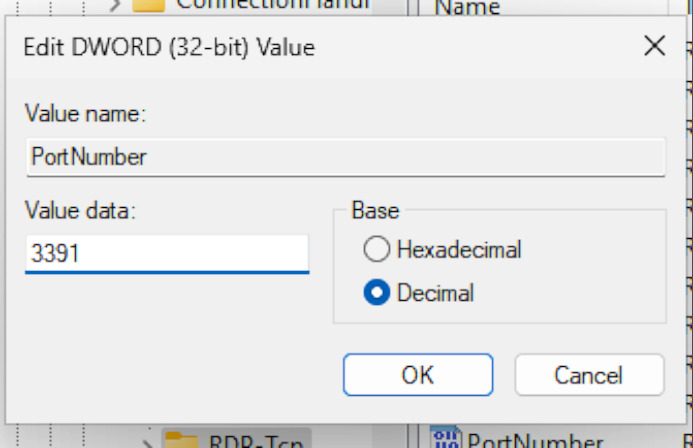
You have successfully changed the RDP port, but it may still be blocked by the firewall. Ways to bypass it are described further in the article.
How to Set RDP Port Number with One Command
PowerShell can be used to change listening port for RDP with a single command. This method is functionally identical to the previous one, and will change the same registry value. It is, however, much faster.
-
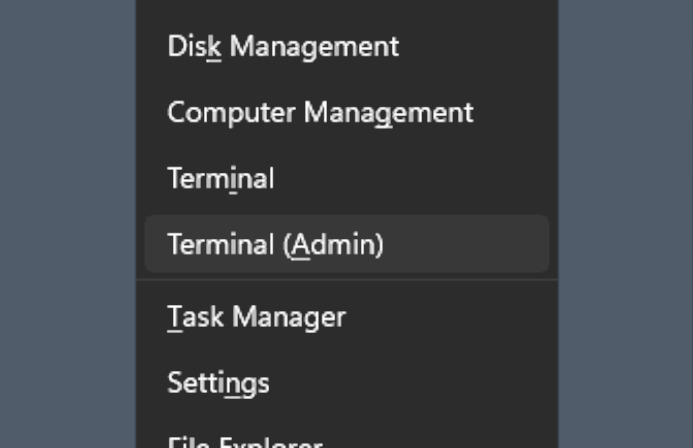
Press Win+X and select “Terminal (Administrator)”.
-
Paste the following command (right-click might not work, use Ctrl-V):\
Set-ItemProperty `"HKLM:SYSTEM\ControlSet001\Control\Terminal Server\WinStations\RDP-Tcp" `-name "PortNumber" -value "[port]“ -
Replace [port] with the number you want to use (no square brackets).
If the command was executed properly, it should give no output.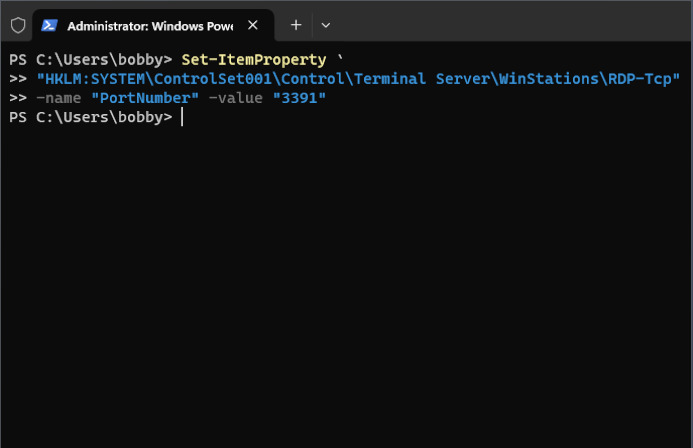
-
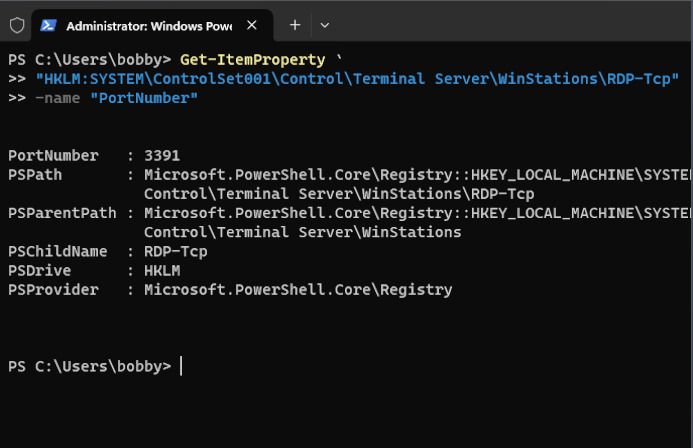
To check whether the port number was changed, use the following command:
Get-ItemProperty `"HKLM:SYSTEM\ControlSet001\Control\Terminal Server\WinStations\RDP-Tcp" `-name "PortNumber" -
And you’ll get a status report. PortNumber is right at the top.
This is it!
Easy Remote Access without Port Settings - HelpWire
Are you having trouble with RDP registry settings? Maybe configuring the server is becoming too difficult, or a system update broke your setup. Try HelpWire!
This free, cross-platform remote access application will let you start a session in seconds, over the internet, with zero setup, and many helpful features. If both machines have internet access, HelpWire is a great, easy-to-use alternative to RDP.
-
Drag-and-drop file transfers
-
Cross-platform support
-
Unattended access
-
Multi-monitor switching
-
Built-in chat
-
And more!
Enable RDP Port Firewall Access
Windows Defender Firewall may block RDP connections, especially on insecure networks. If you are confident that the networks you are using are safe for RDP access, you can add an exception for your Remote Desktop port. This can either be done from the Control Panel, or with a single PowerShell (Admin) command.
If you want to use the command, here it is:
New-NetFirewallRule -DisplayName "[name]" -Profile "Public" `-Direction Inbound -Action Allow -Protocol TCP -LocalPort [port]
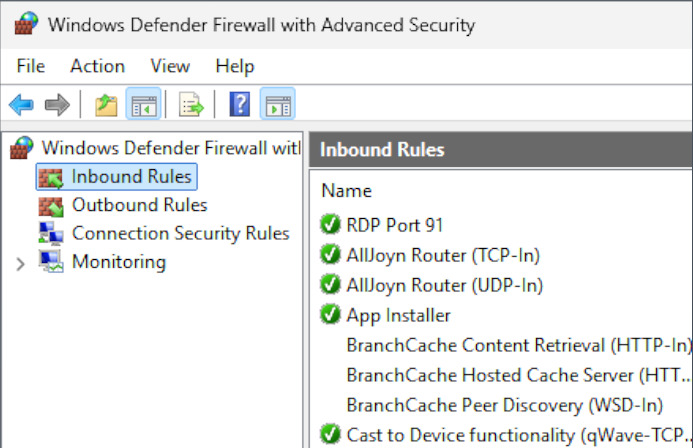
Just replace [port] with your PortNumber and [name] with the name for your exception (once again, no square brackets). You can also choose any name you like, just make sure that it’s easily identifiable, such as “RDP Port 91”, in case you ever want to delete or temporarily disable the rule.
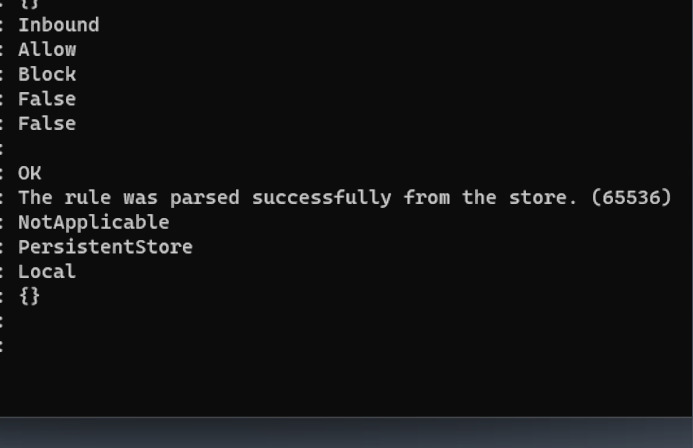
PowerShell should report that rule creation was successful:
-
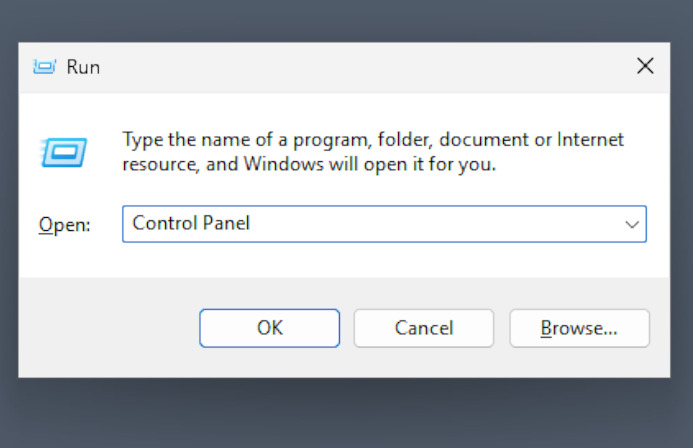
Press Win+R and launch the Control Panel.
-
Go to “System and Security” > “Windows Defender Firewall” > “Advanced Settings”.

-
Select “Advanced Settings” and then “Inbound Rules”.
-
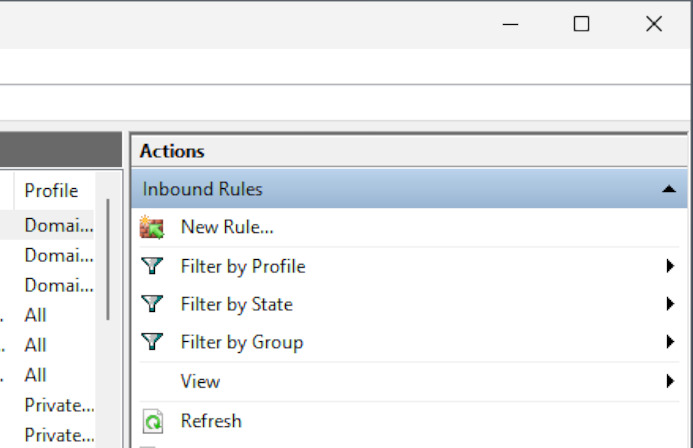
Under Actions, select “New Rule”.
-
Specify that it’s a port rule.

-
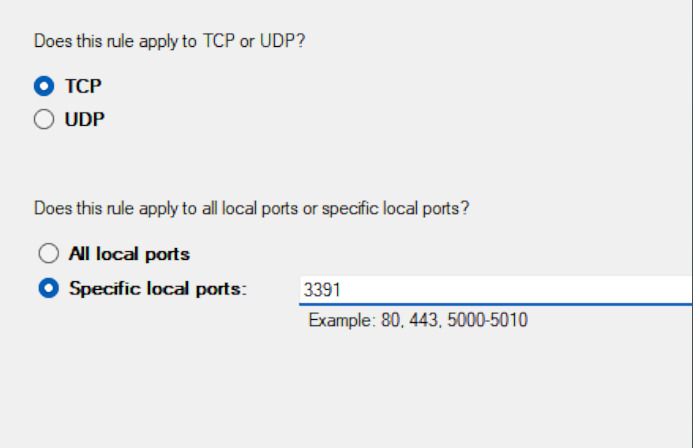
Select “TCP” and enter the desired port number.
-
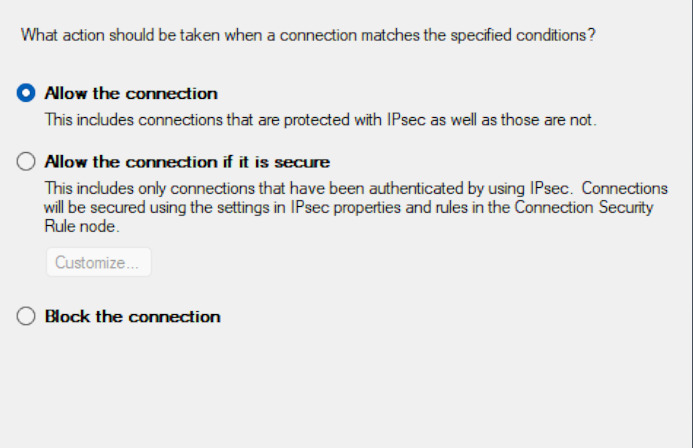
Set the rule to allow connections.
-
Check every box here if you want your RDP port to be accessible on any network.
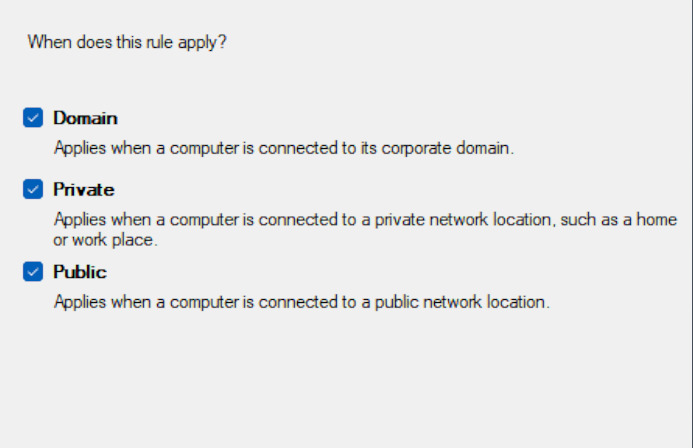
Select any name for the rule, and you’re done.
Frequently Asked Questions
RDP can use any port as long as it’s not taken up by a different application or reserved by the system, such as ports 135 and 445.
Port 3389 is used for RDP by default. This can be inconvenient, since RDP-based applications like VirtualBox use it as well. And it’s also an easy target for hackers, if your password is too simple.
It’s common practice to choose ports that are close to 3389, such as 3387, 3390, etc.