GoToMeeting Screen Share Not Working: How to Fix It
- HelpWire
- →
- Blog
- →
- How to screen share on GoToMeeting
- →
- GoToMeeting screen share not working
Sometimes GoToMeeting fails at screen sharing. This can be hugely frustrating for the presenter and the attendees alike, especially during an ongoing presentation when you are explaining something. It can also make your point less convincing to the listeners since you are unable to present visual, real-time data on the screen.
In this article, we’ll explore how to troubleshoot GoToMeeting screen sharing not working on your device.
Give Screen Sharing Permissions
Lack of permissions is a common reason for GoToMeeting to fail at screen sharing.
So, if you are to use the feature, just go to the system settings and enable the needed permissions to continue sharing your screen on your device while using GoToMeeting.
There are slightly different procedures for screen sharing on different operating systems such as Windows, macOS, iOS, and web browsers. Given below are steps for each OS separately.
MacOS
To troubleshoot GoToMeeting screen share is not working on Mac users have to complete additional steps to enable full control and usage of screen share in the app.
-
In your computer screen’s top left, locate the Apple icon and clock on it. Next, select “System Preference”.
-
Choose “Security & Privacy”.

-
At the window’s top, go to the tab “Privacy”.
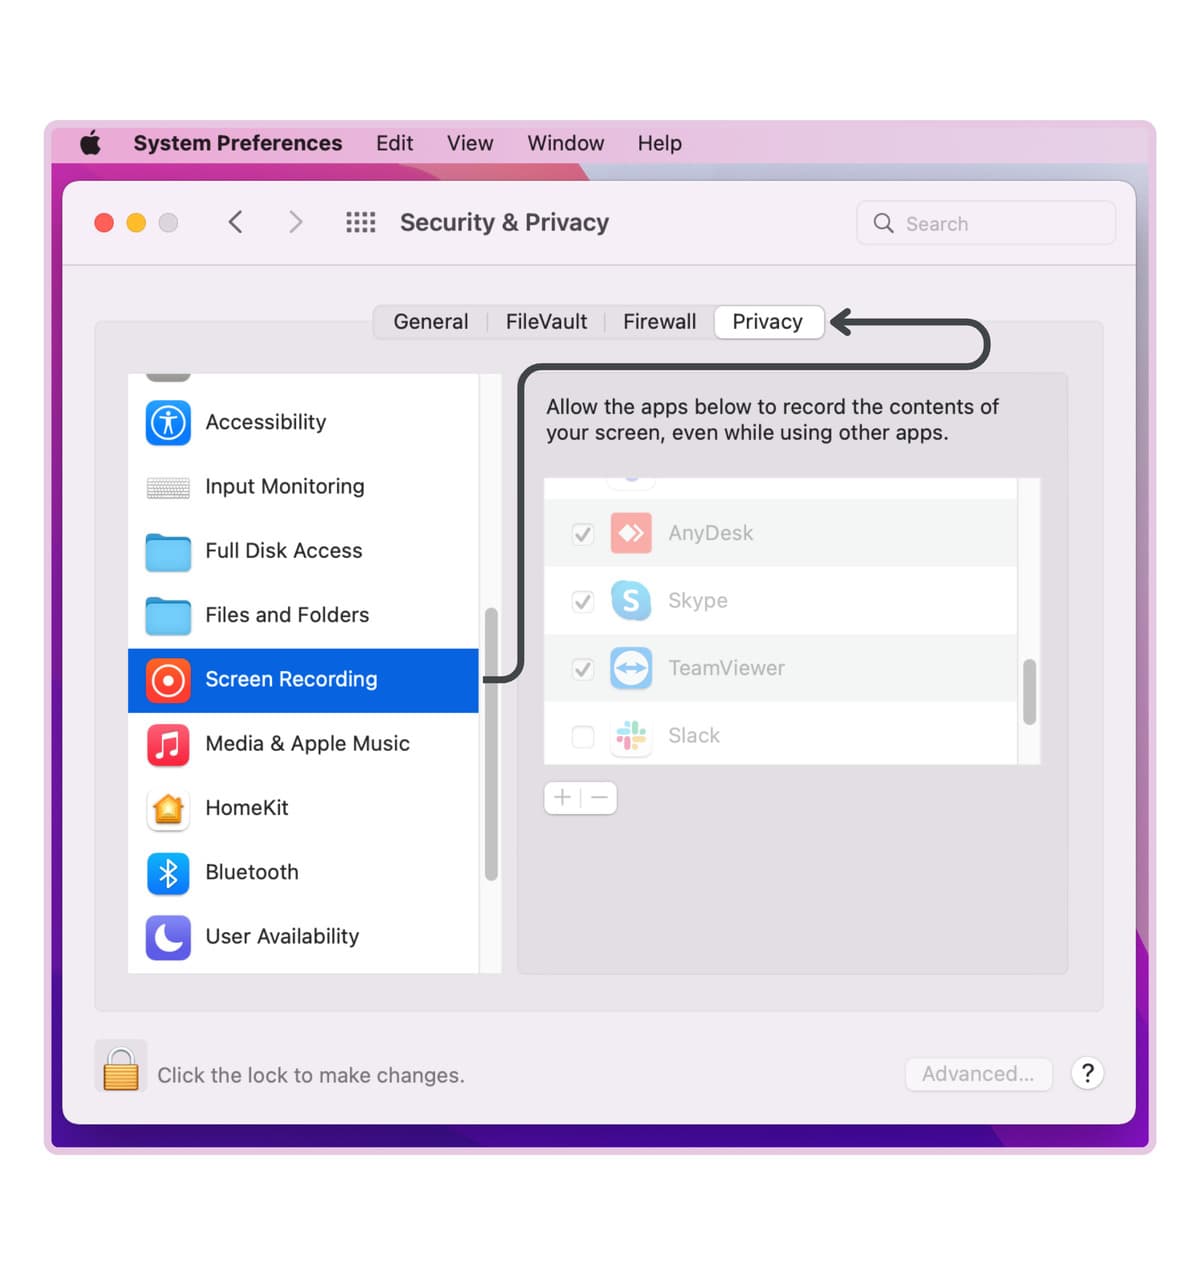
-
At the window’s bottom left, you will find a lock icon. Click on it.
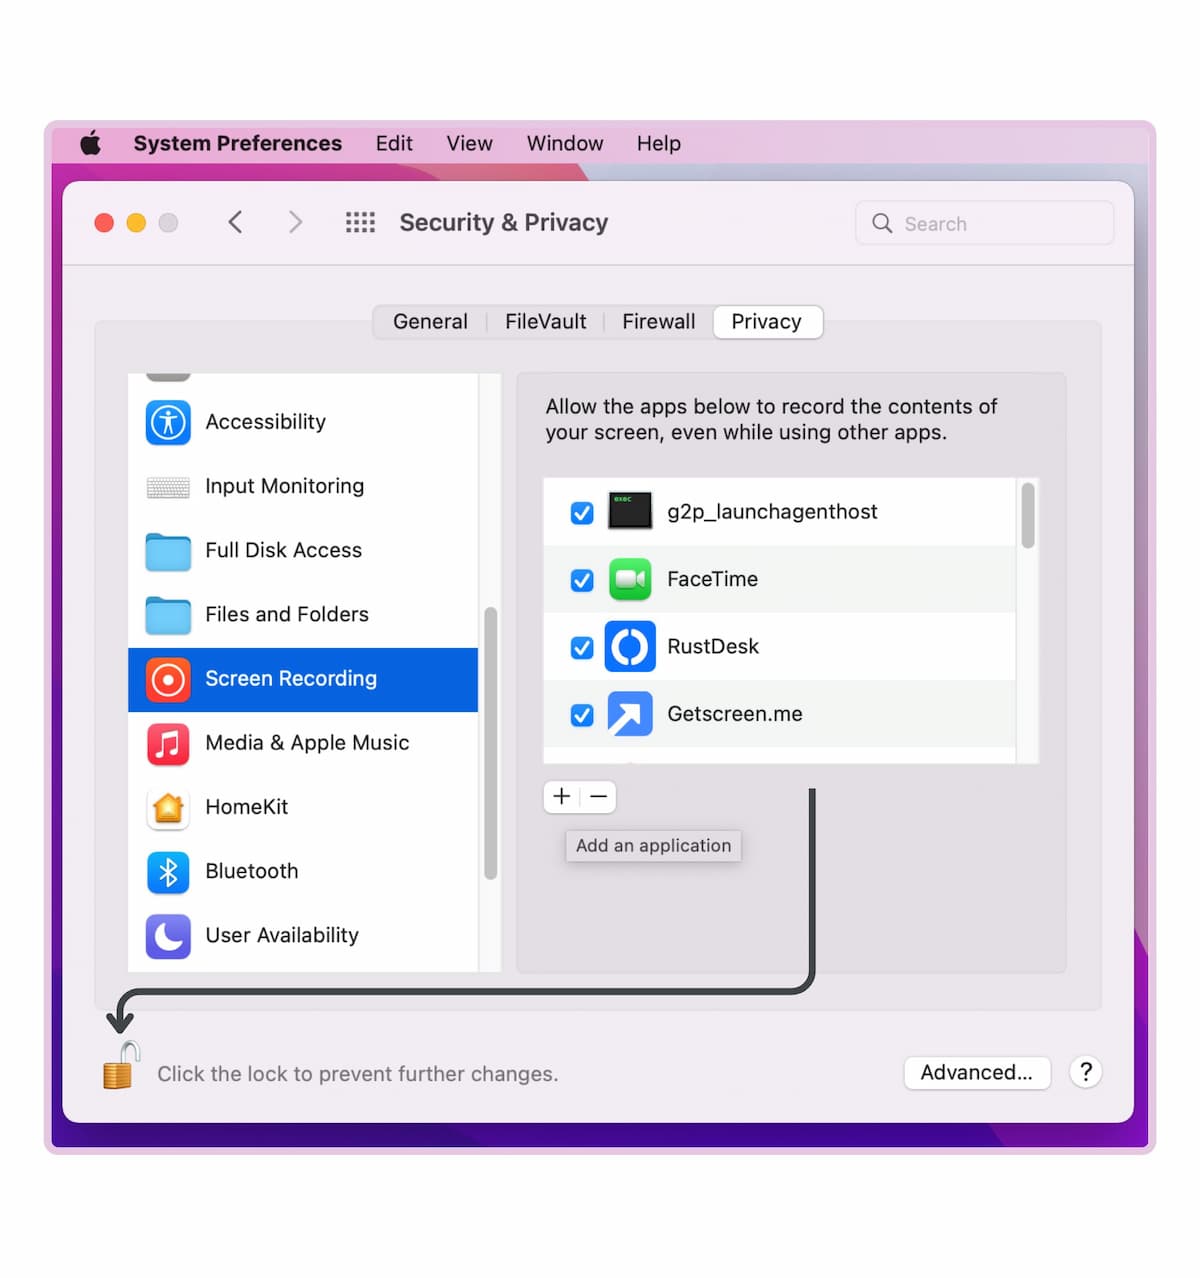
-
The left-hand menu will have an option – “Screen Recording”. Select it.
-
Check the box beside “GoToMeeting” to enable it.
-
Select “Accessibility” from the left-hand menu.
-
Beside the GoToMeeting you will find a box. Enable it.
Windows
If you want to resolve GoToMeeting screen sharing issues on Windows 10/11, enable microphone and camera access for the GoToMeeting application. Below are the steps to do that:
-
Go to Windows settings and choose “Privacy”. From the left-hand pane, locate and choose “Camera”.
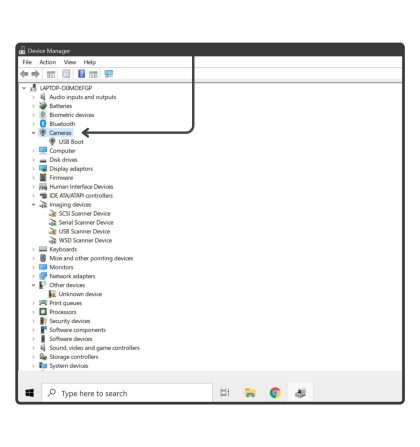
-
From the Camera privacy settings, enable these two options:
• “Allow apps to access your camera”
• “Allow desktop apps to access your camera”
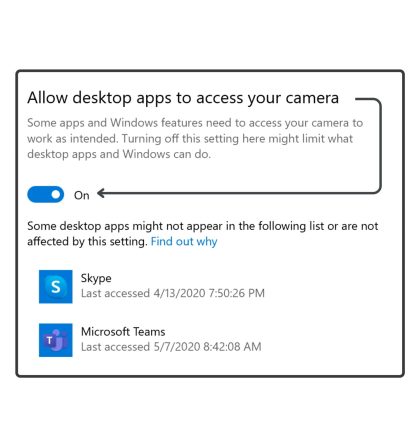
-
Restart the GoToMeeting application. Check whether the feature screen sharing is working or not on your windows computer.
Ios
To fix GoToMeeting screen sharing problems on iOS devices follow the steps:
-
Download GoToMeeting and install it on your iOS device.
-
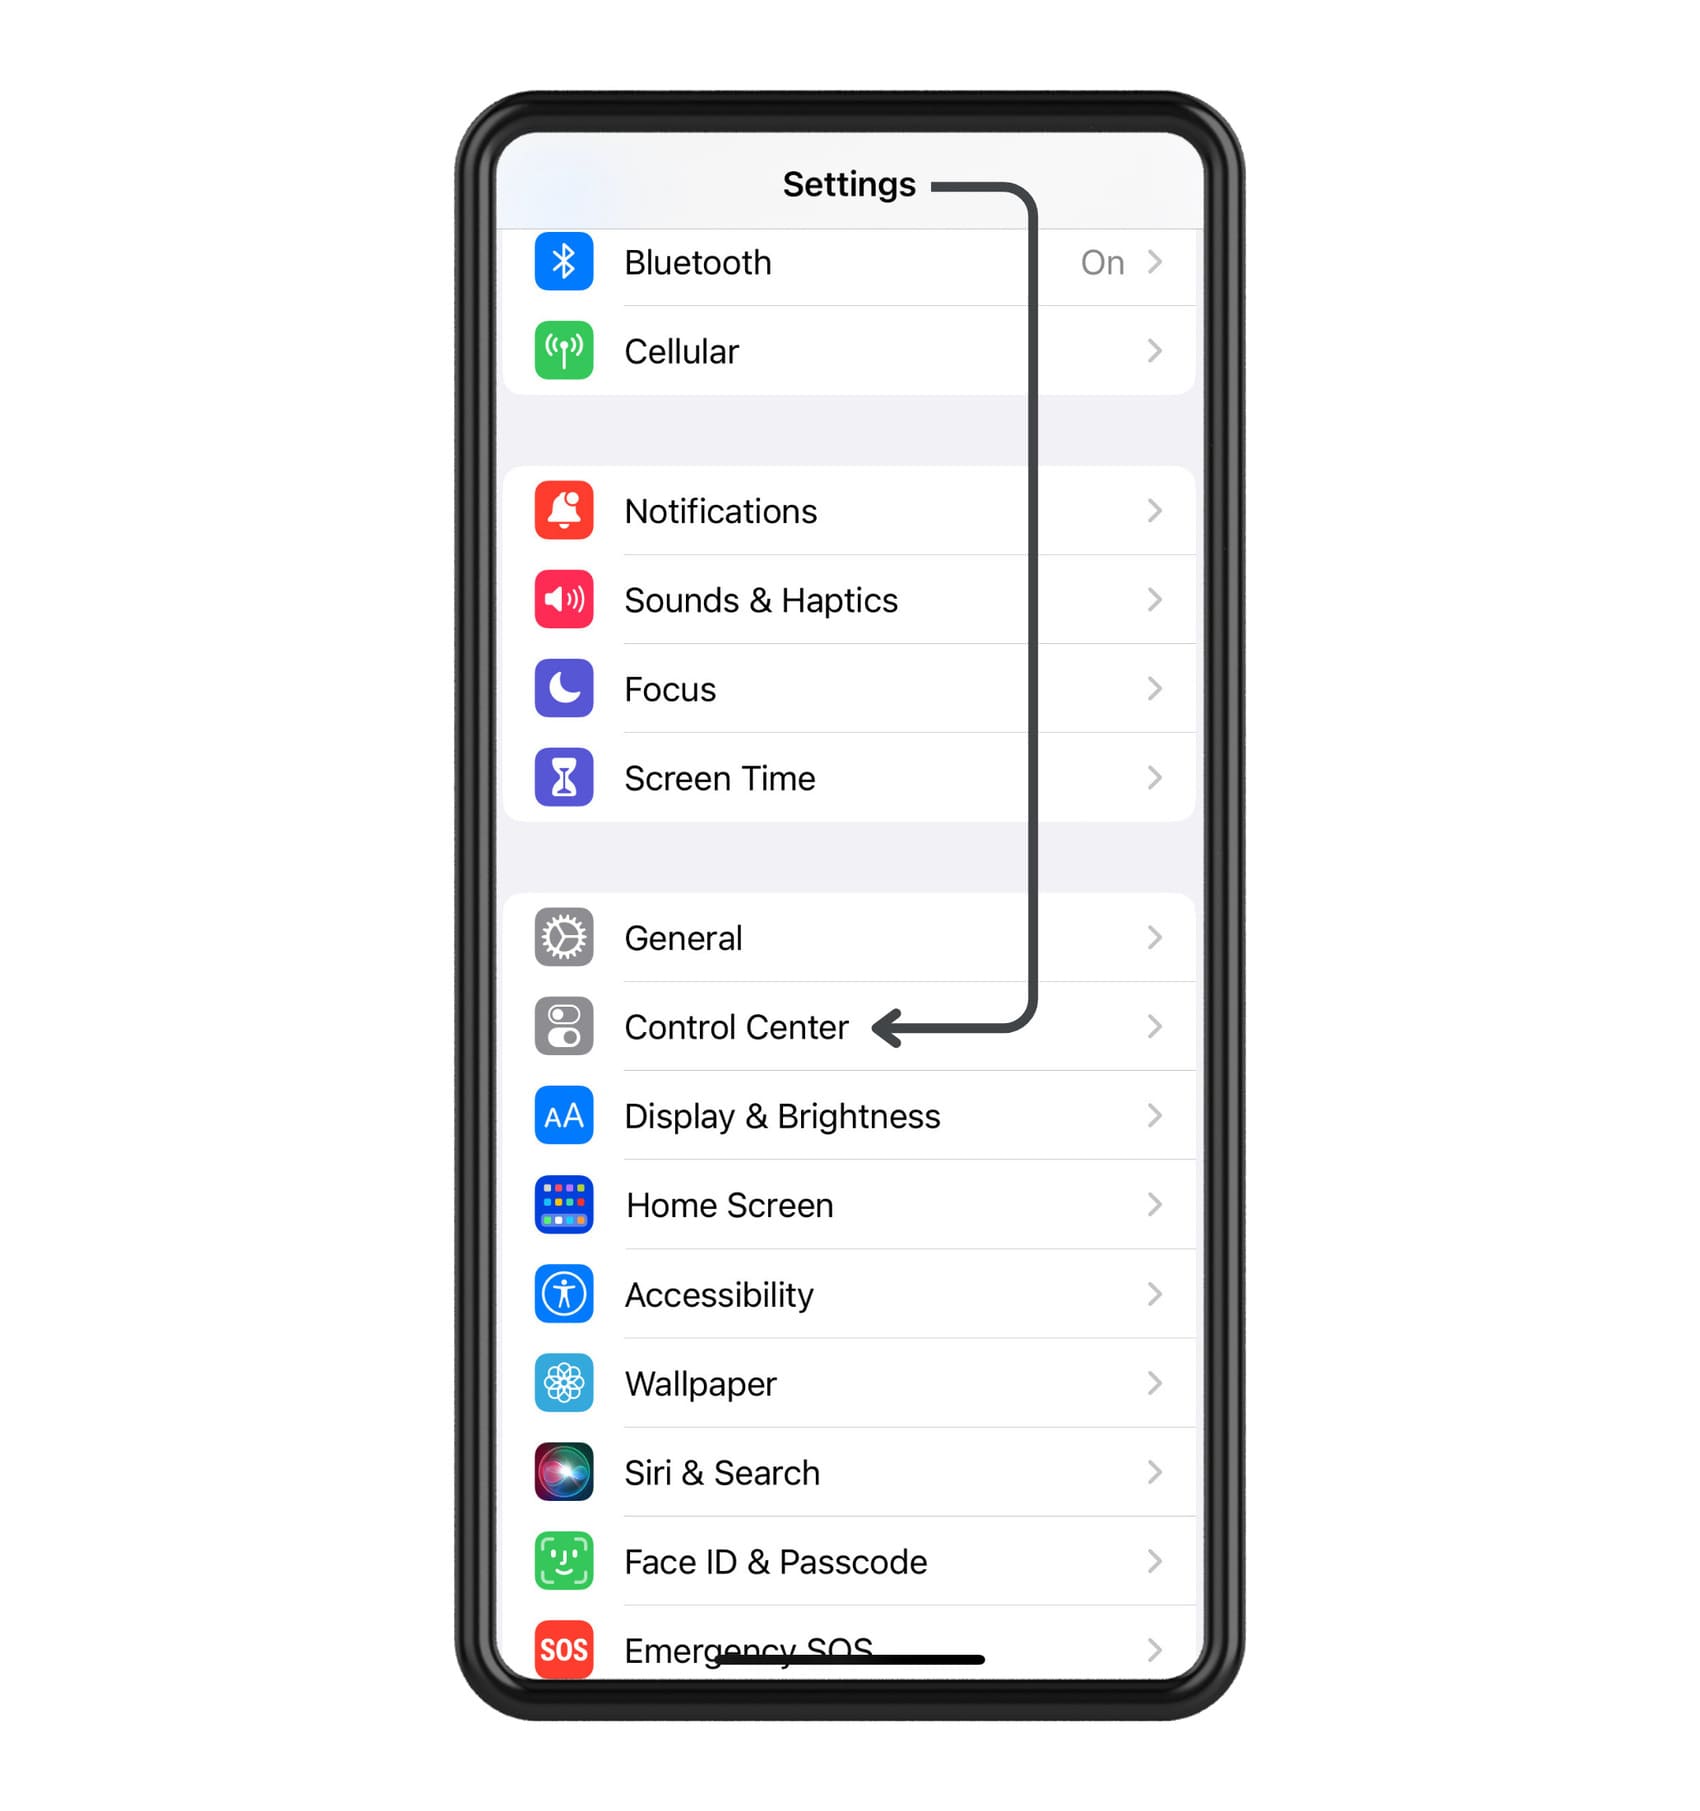
Open “Settings”.
-
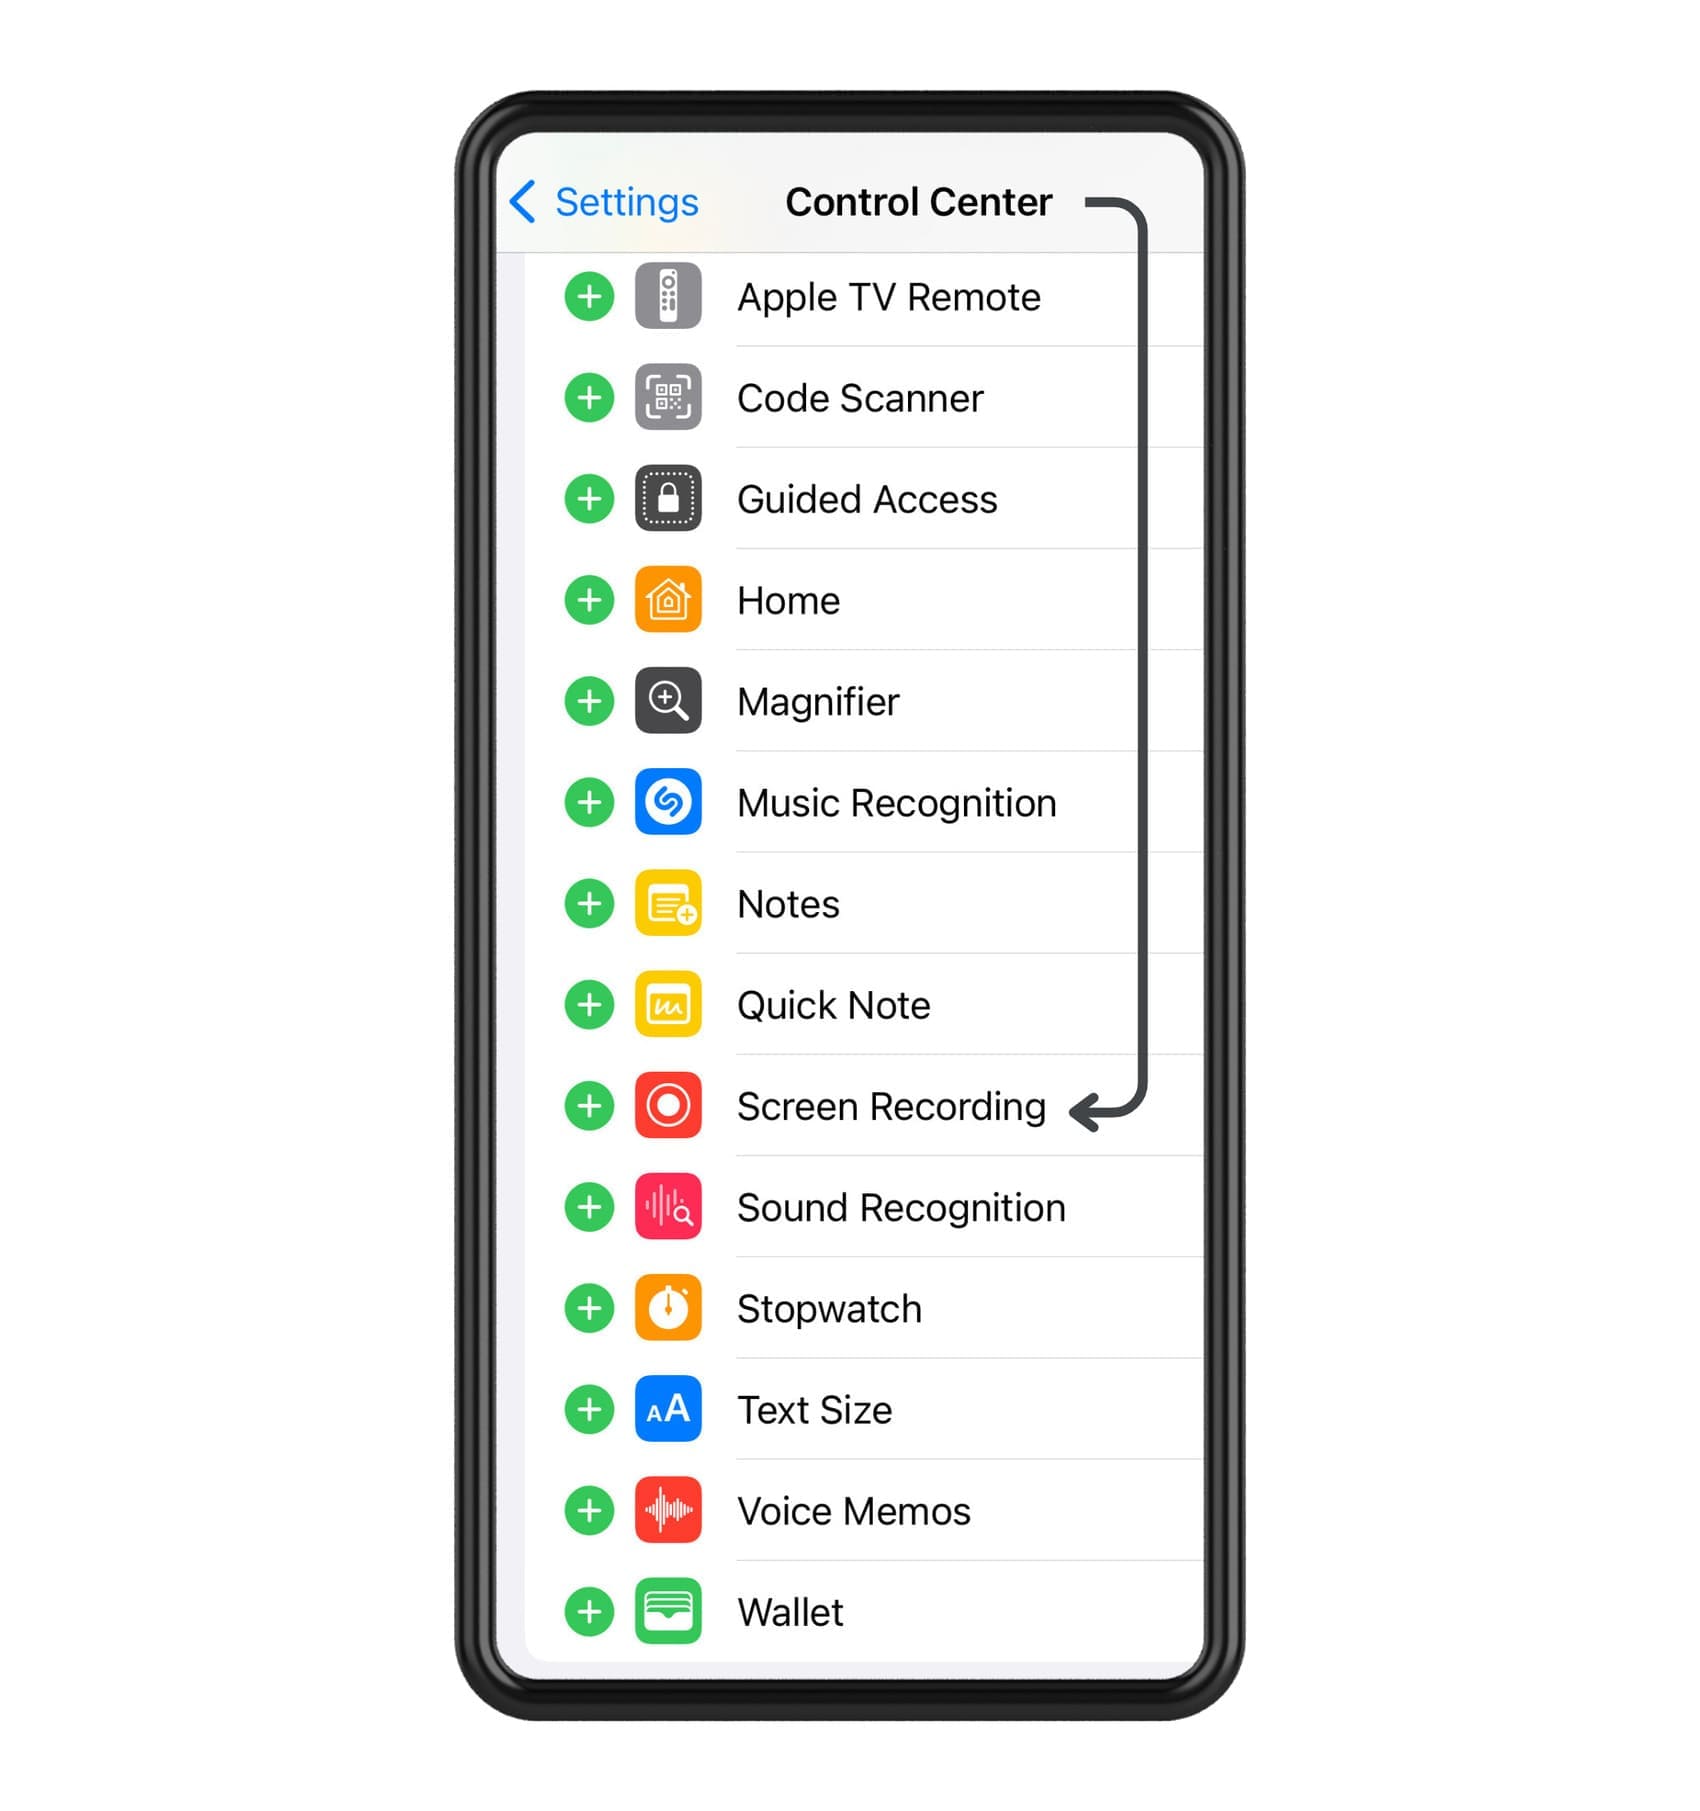
Go to “Control Center” and choose “Customize Controls”
-
Look for a “+” sign beside “screen recording”. Tap on it to add a section.
So, that was the complicated part. Next, follow the three simple steps to activate screen sharing on iOS:
- In the GoToMeeting application, join a meeting.
- At the screen’s bottom, you will find the button for screen recording. Press the button and hold it.
- From the list, choose GoToMeeting and then choose “Start Broadcast”.
Web Browser
So, if you are not using any application and decide to use GoToMeeting directly from your web browser, you still might face issues while sharing your screen. It may happen due to cache and firewall restrictions.
Clean Up Browser Cache
Ensure to clear all the browser cache from basic to advanced level by following the below steps:
-
Launch the web browser you use on your computer. GoToMeeting recommends users to use Microsoft Edge or Google Chrome browser while joining a meeting directly from the web.
-
Go to the official site of GoToMeeting and check whether web-based screen sharing is available or not.
-
Press Ctrl + Shift + N to open a new tab on incognito and then retry sharing the screen.
-
If the problem still persists, press Ctrl + H to open your web browser history. Tap on “Clear Browsing Data”, which you can find in the left pane.
-
Locate the “Advanced” tab once you see the web browsing history. You can set the time range to “All Time” and then check all the options you wish to clear the history for. Once done, locate the option “Clear data” appearing at the bottom and tap on it.
This must solve the issue so that you can share your screen from your browser while using GoToMeeting.
Install the Latest App Version
Many users have complained that they were unable to perform screen sharing after updating to Big Sur. The good news is that the latest update of the GoToMeeting application has fixed its compatibility issues.
So, if you have updated your macOS or Windows 10 version recently, ensure you also install the latest app version of GoToMeeting.
Reinstall GoToMeeting
Sometimes some corrupted files in your app might cause trouble when you use certain features.
For this, you may try uninstalling the GoToMeeting application and then reinstalling it freshly. This must fix corrupted files that might be causing problems while sharing your screen in GoToMeeting.
Use Different Software
When you have tried everything and still nothing works, you may contact the IT admin to help you. They might have set some screen-sharing restrictions that are causing the trouble. So, they will need to disable that.
But if that also doesn’t help, you may try using other web conferencing software like Zoom, Teams, Skype, etc.
Conclusion
If the GoToMeeting screen share is not working on your device, it might be due to issues like cache, corrupted files, bugs, etc. Clearing the cache or updating or reinstalling the app might solve the issue. But if the feature still doesn’t work despite trying everything, try some other web conferencing tools.
FAQs:
Before you start sharing, ensure to provide the needed access permissions. Once done, do the following:
- Join a training or start a new one.
- From the lower toolbar, locate and choose the icon “Share”.
- Choose the application or screen you wish to share. Click on “Share”.
- If you want to pause your screen or resume it, choose “Resume sharing” or “Pause sharing” from the drop-down list.
- Choose “New” if you want to share a different screen.
- If you want to stop the screen share, choose the icon “Share” again.
By following these steps, you should be able to easily share your screen during a GoToMeeting session on your Mac:
- Before opening the GoToMeeting app, make sure it has permission to screen record. Go to System Preferences -> Security and Privacy -> Privacy tab -> Screen Recording, and check the box next to GoToMeeting.
- Log in to your GoToMeeting account. Click on the “Meet Now” button to start your meeting.
- In the toolbar, locate and click on the Share icon. This will bring up a pop-up window displaying different screen sharing options.
- Choose how you want to share your screen with the attendees: either by sharing your entire screen or specific applications and click on the “Share” button.