Definitive Guide to Using Microsoft’s Remote Desktop in Windows 10 & 11
Microsoft Remote Desktop provides an easy-to-use option to connect to a remote computer. As long as the remote computer is turned on and remote desktop connections are allowed, you can enjoy full remote access to run programs, access files, and all peripheral devices.
For Remote Desktop connections, Remote Desktop Connection (RDC), built into Windows, will remain available for Windows-to-Windows connections. However, RDC has limitations, such as no cross-platform support and complex configurations, prompting many users to seek alternative remote desktop solutions.
Consider HelpWire — a free, easy-to-setup remote desktop tool that provides cross-platform support for Windows, macOS, and Linux.
Read on for an in-depth guide on how to create a remote desktop connection using a classic Remote Desktop Connection or a modern Remote Desktop app for Windows 10 and 11.
To connect to a remote PC, you should allow the Remote Desktop in Windows 10 or Windows 11 settings or via the Control Panel first as it is disabled by default.
Enabling Remote Desktop in Windows settings
But let’s start with the very initial step — to connect to a remote computer, you have to allow remote access to it first.
• Open Start → Settings → System → Remote Desktop.
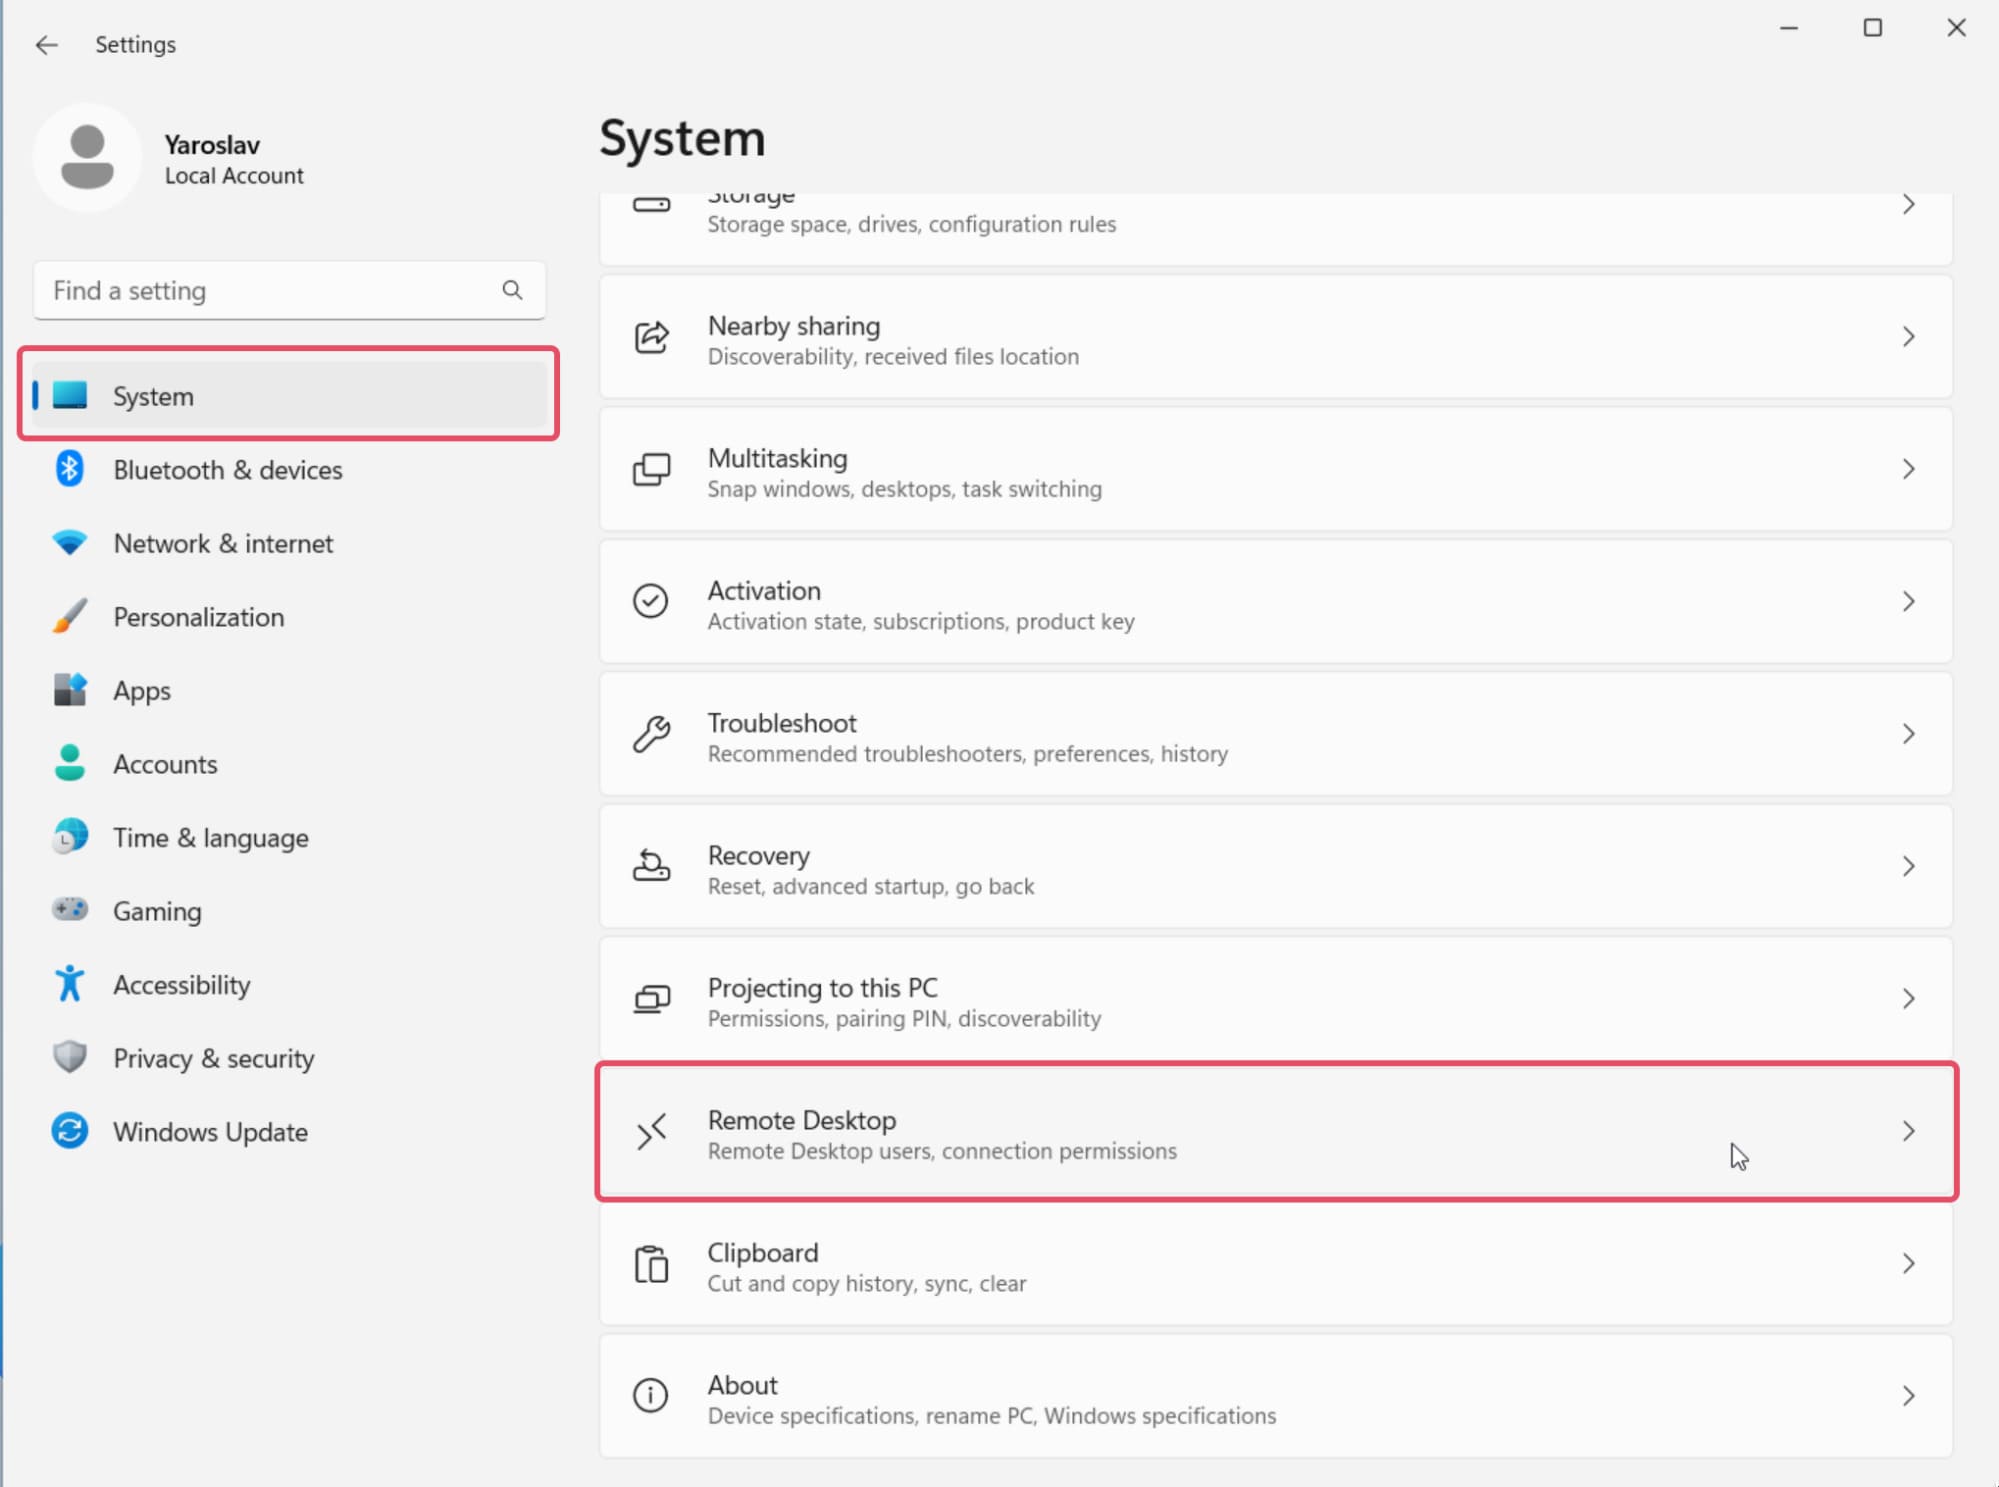
• Change the slider position from “Off” to “On”, and click “Confirm” in the “Remote Desktop Settings” window.
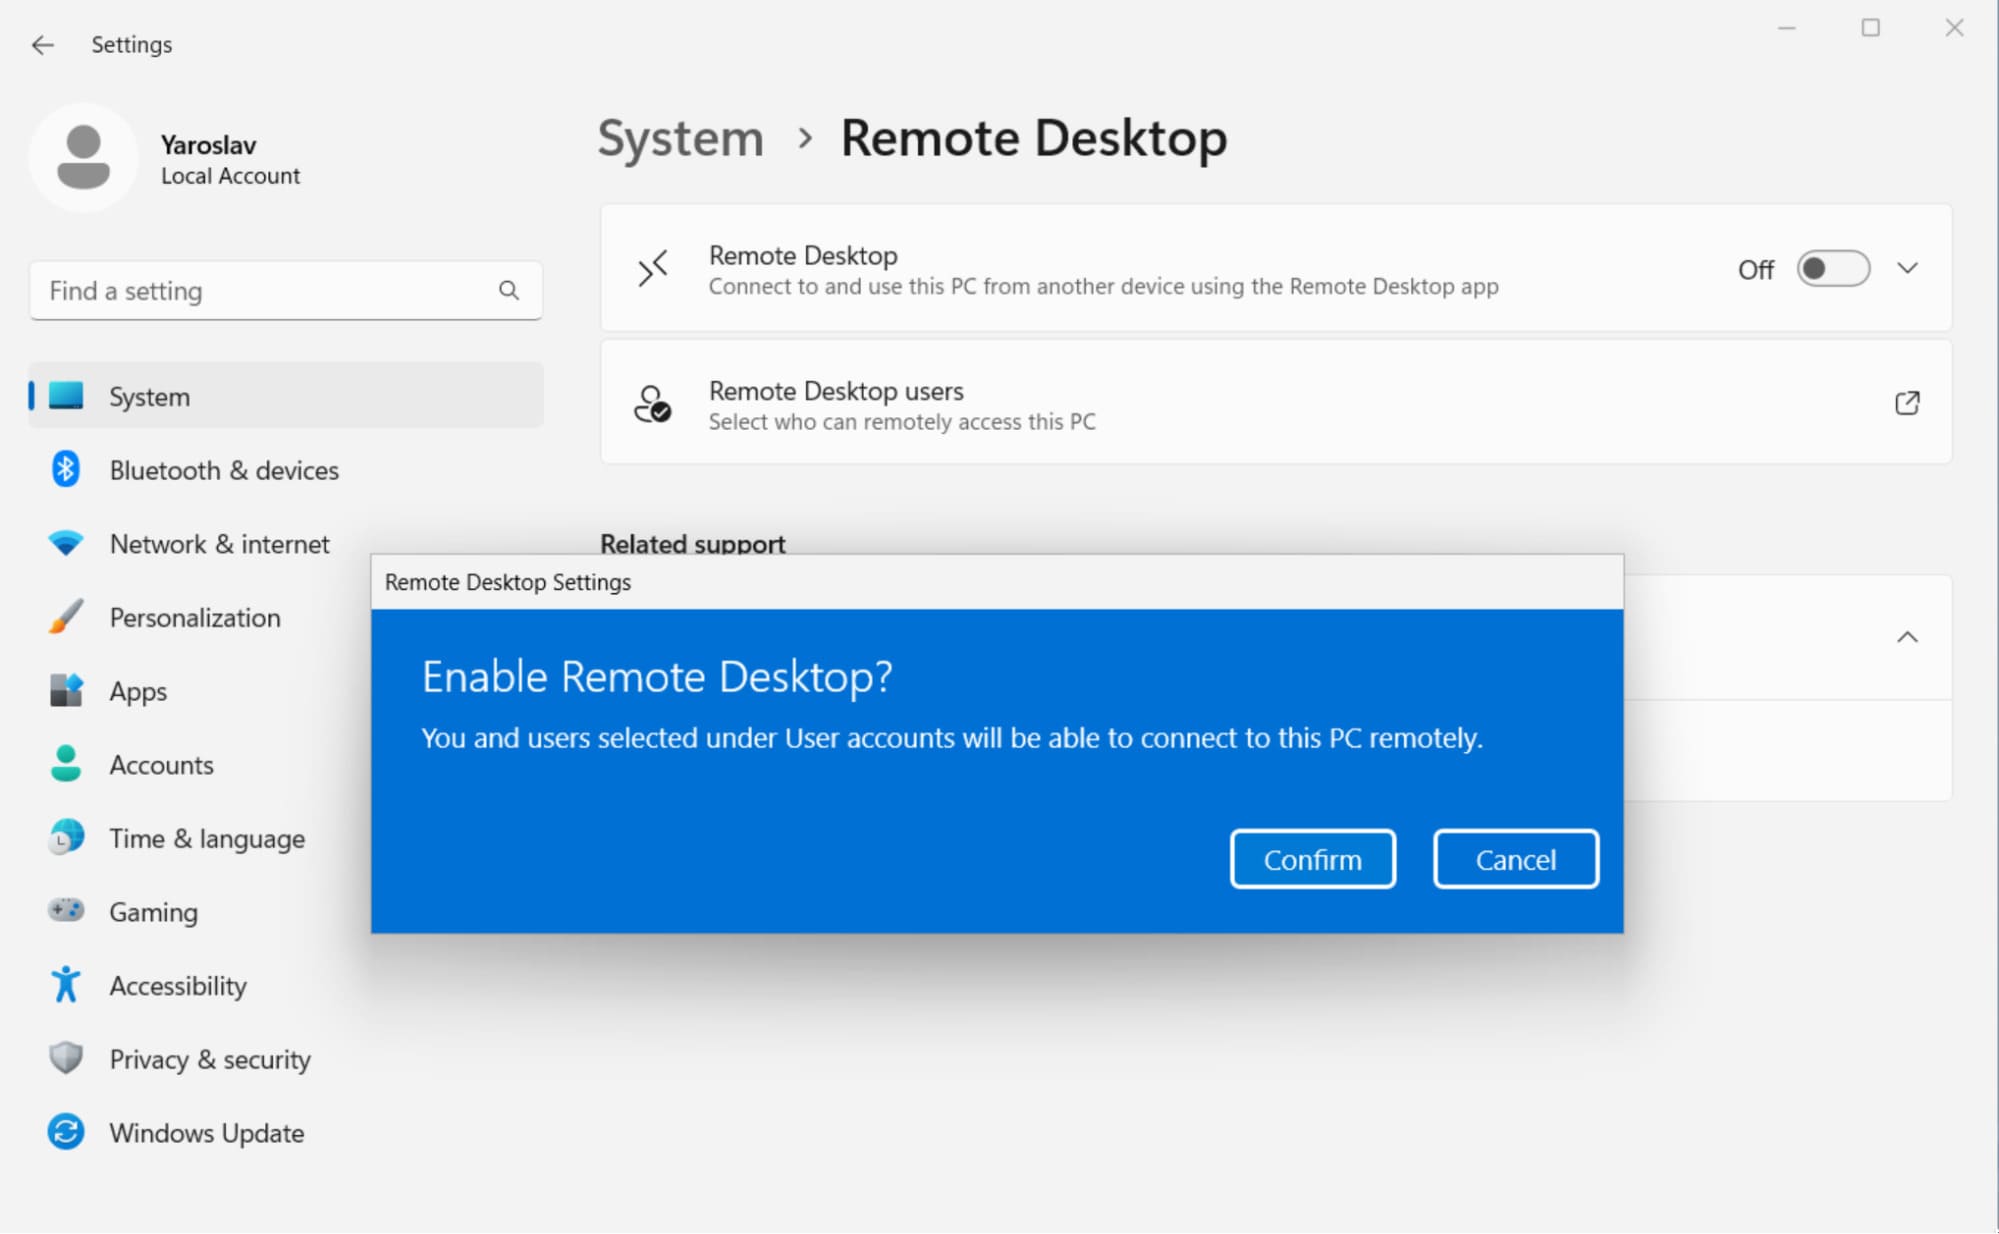
As you can see, allowing remote connections is quite straightforward in Windows, as you simply have to toggle a single switch in the settings.
Classic Windows Remote Desktop Connection App
The classic Remote Desktop Connection (RDC) application is still very popular among Windows users. Unlike the modern counterpart, this software package comes pre-installed with every Windows version so you don’t have to go to a store to download it and can start using it right away.
How to create a remote desktop connection
-
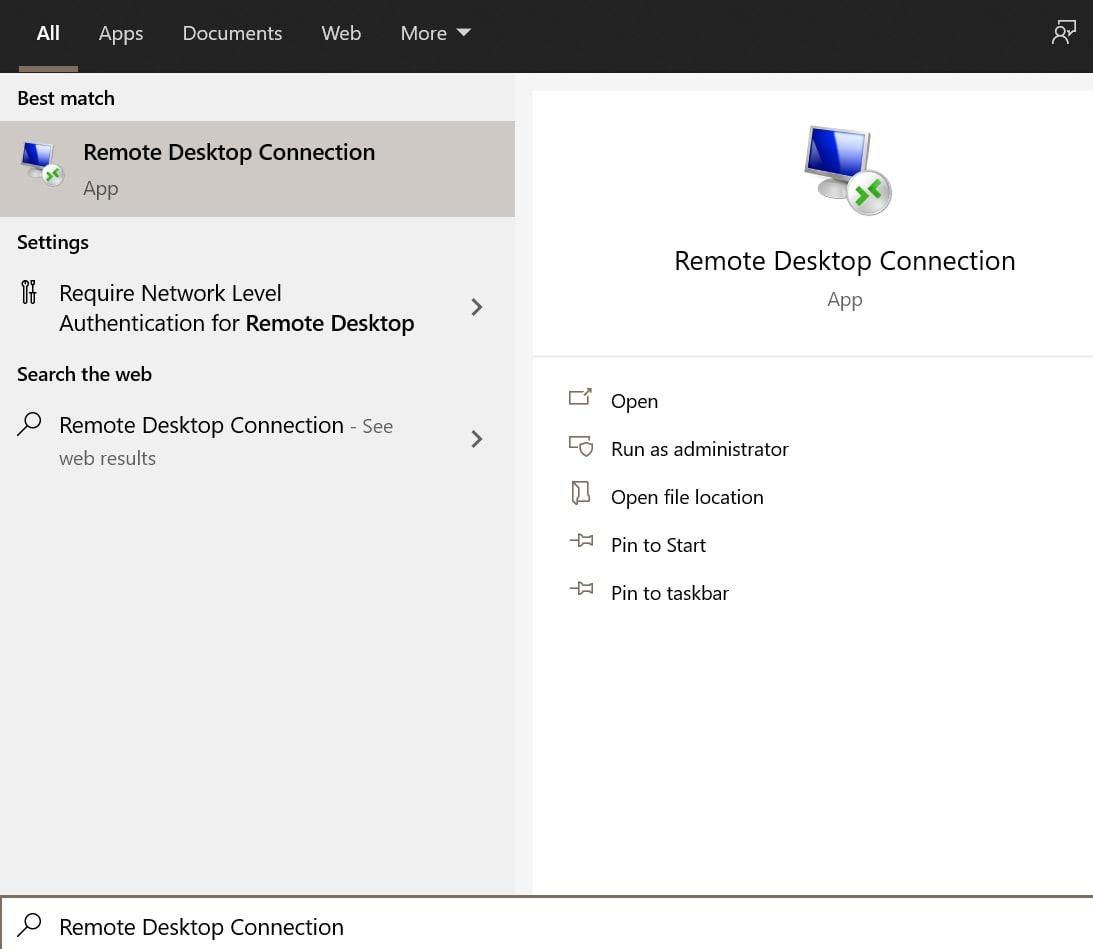
Open Windows search and type “remote desktop connection” to search for the RDC app. Then, click on “Open” to launch the Remote Desktop Connection app.
-
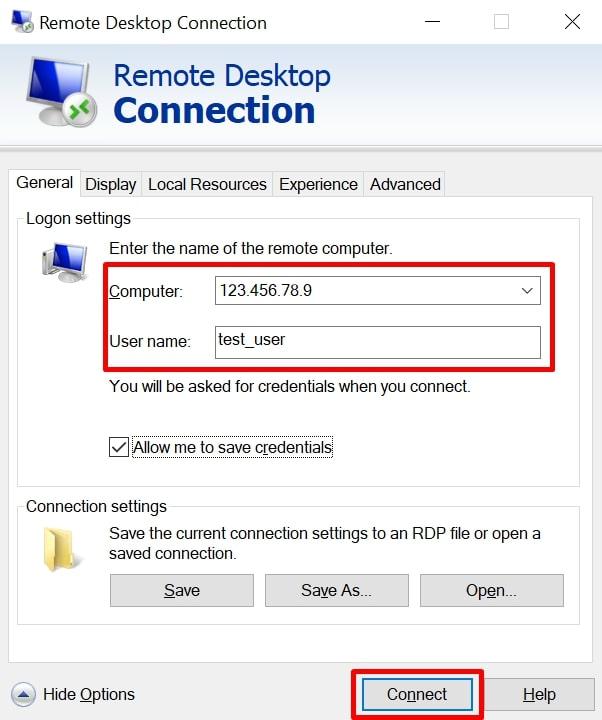
Select the IP address or name of the computer that you want to connect to. Type your username in the User name field. For ease of use for future connections, you can save your credentials by selecting the “Allow me to save credentials” checkbox.
-
To connect to a remote computer via Remote Desktop Connection, click the “Connect” button.
-
Enter your account password when prompted to do so. Check the “Remember Me” checkbox to avoid having to enter your credentials each time you connect to a remote desktop.
-
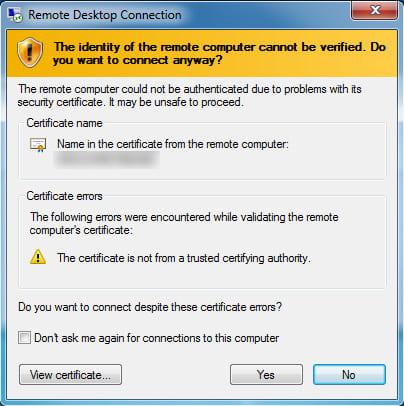
If you see an alert that the identity of the remote computer can not be verified, you can ignore it, and simply tick the “Don’t ask me again for connections to this computer” to dismiss the message and remember your choice. When done, click “Yes” to save and continue.
-
The remote computer’s toolbar at the top of the screen will indicate that you have successfully launched a remote desktop session.

Closing the remote session window will terminate the remote connection.
The classic Remote Desktop Connection app’s settings
Use the Remote Desktop Connection setup screen to change the remote session’s settings. The following are available options:
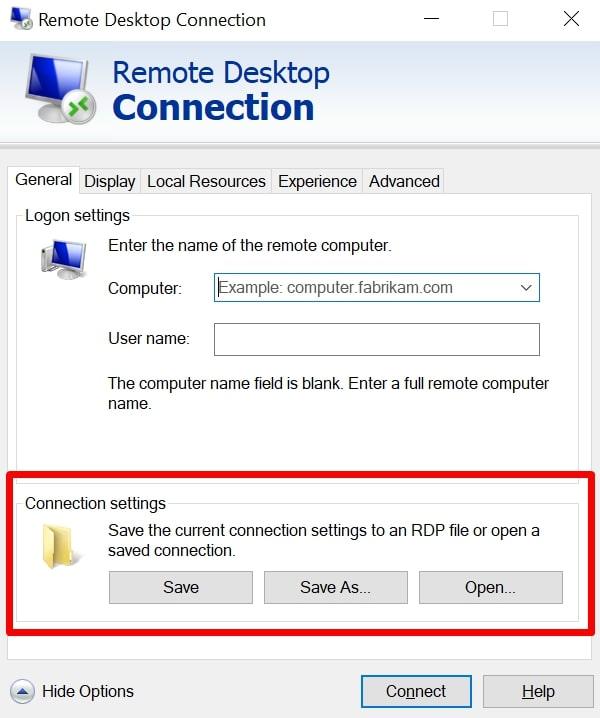
• General. You can save your connection settings in an RDP file which can be transferred and used between various computers.
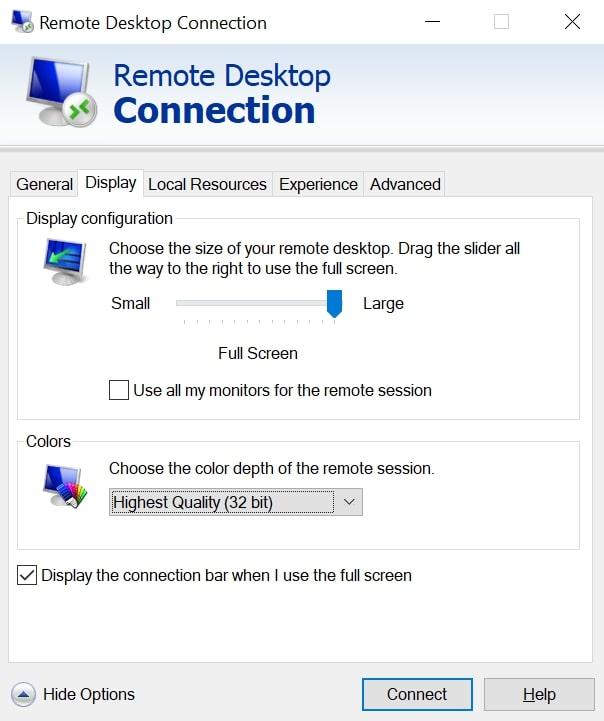
• Display. Configure your display preferences from screen size, multi-monitor support, and color depths.
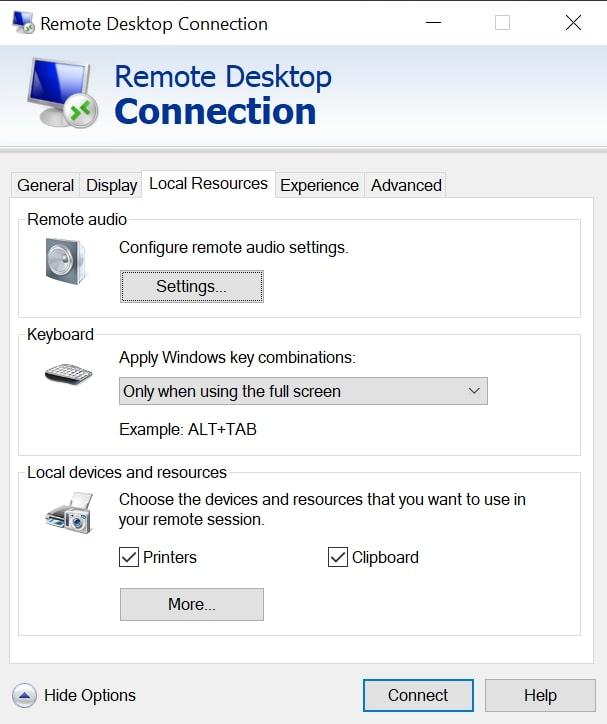
• Local Resources. Configure local resources that are accessible during the remote desktop session. Choose Windows keystroke combinations for various actions as well as configure your remote audio settings.
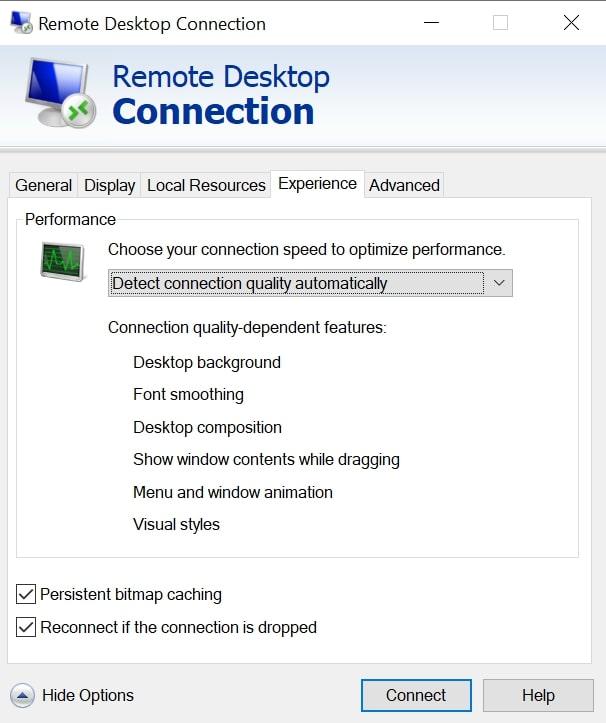
• Experience. Choose the best connection speed for the best performance. This includes options for bitmap caching and enabling the auto-reconnect function.
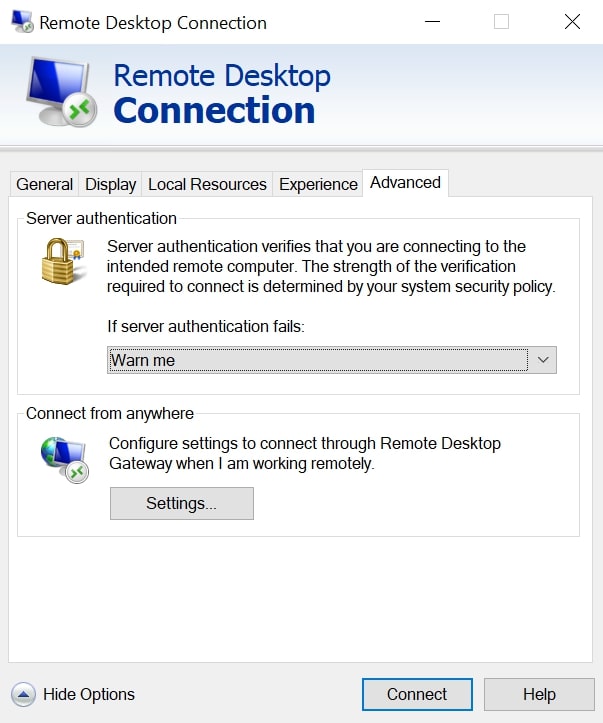
• Advanced. Configure how the app deals with server authentication failures. You can also configure your gateway settings for remote working.
Easier way to control the remote PC
The user-friendly approach of this free remote desktop software for Windows, simplifies the traditional complexities of establishing remote PC connections, making it an accessible option for users of all levels. Not only does it offer a streamlined user experience, but it is also completely free for both commercial and personal use!
-
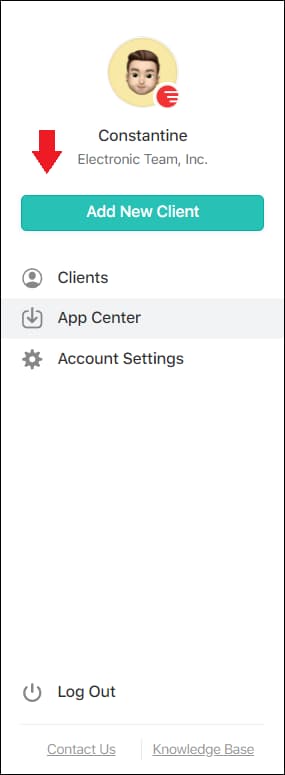
Start by selecting ‘Add New Client’ in the HelpWire interface.
-
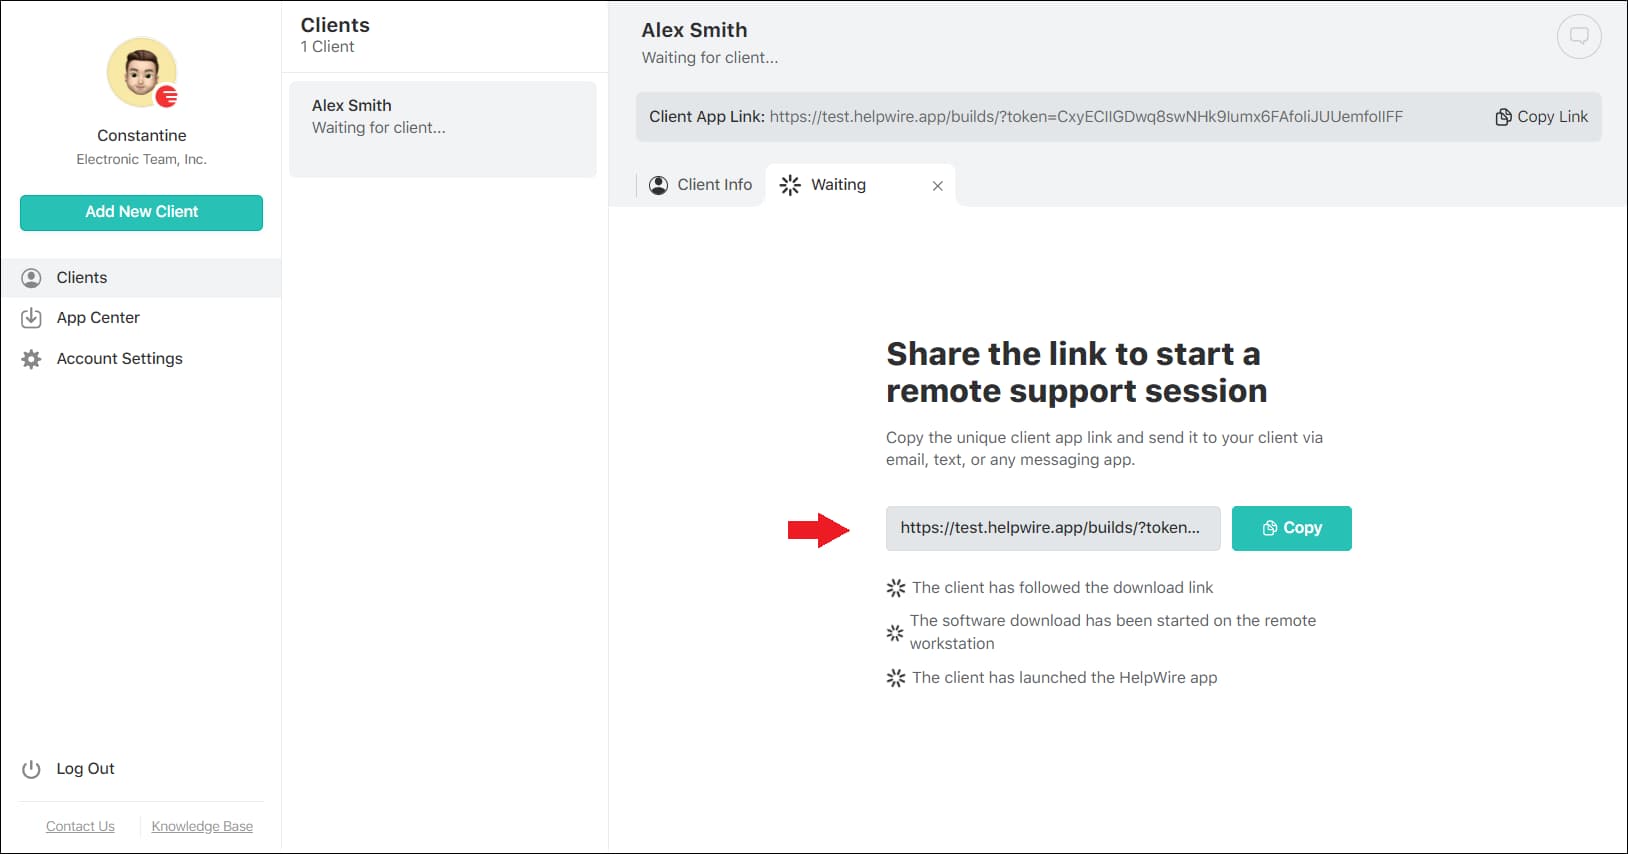
Distribute the auto-generated remote connection link to your client. This link prompts them to download the HelpWire Client application on their computer.
-
Once the client has the application running, use the HelpWire interface to request access to their system.
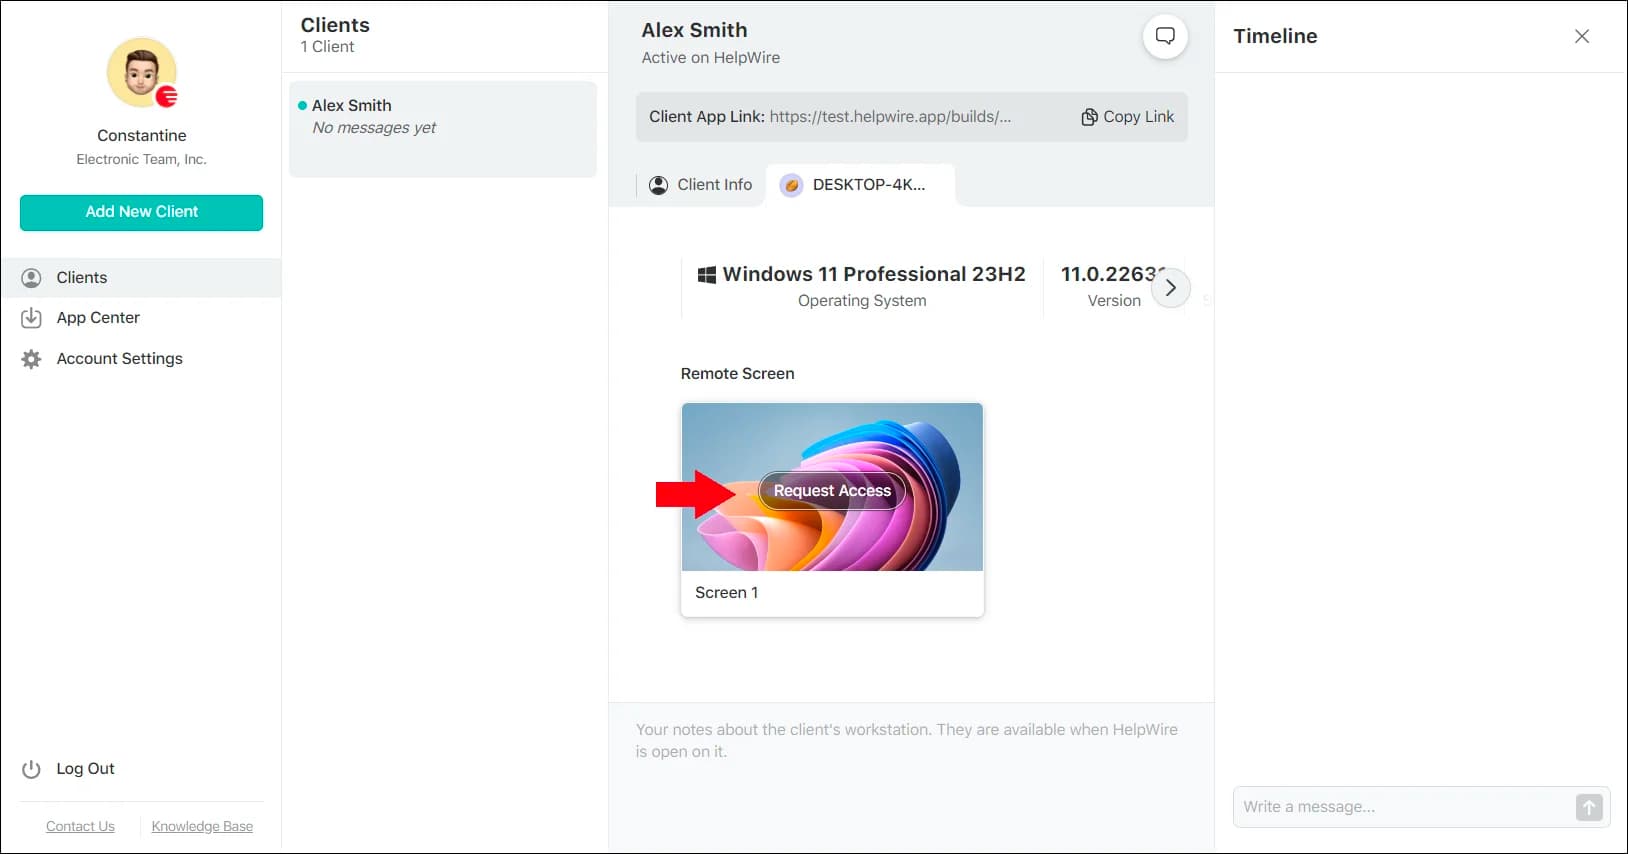
-
After receiving the client’s permission, click ‘Connect’ to start the remote desktop session.

HelpWire revolutionizes remote desktop access, offering a streamlined and efficient method, perfect for those who prioritize ease of use and time-saving solutions in remote connectivity.
Summing up
In summing up, this guide provides a comprehensive overview of using Microsoft’s Remote Desktop in Windows 10 and 11. It details the steps to enable remote desktop access, explores both the modern Remote Desktop app and the classic Remote Desktop Connection app, and introduces the user-friendly alternative, HelpWire. This guide caters to different preferences and needs, ensuring users can effectively manage and access their PCs remotely, whether for professional or personal use.
Frequently Asked Questions
reg add “HKEY_LOCAL_MACHINE\SYSTEM\CurrentControlSet\Control\Terminal Server” /v fDenyTSConnections /t REG_DWORD /d 0 /f
When using the Command Prompt, use the Run as administrator option.